In order to set-up a token permissioned channel on Discord, you first need to have a server. You can create a new server or use an existing one. We'll be using a brand new server for this example, but you can follow the same steps for an existing server and just use already existing roles and channels.
Step-by-step Guide
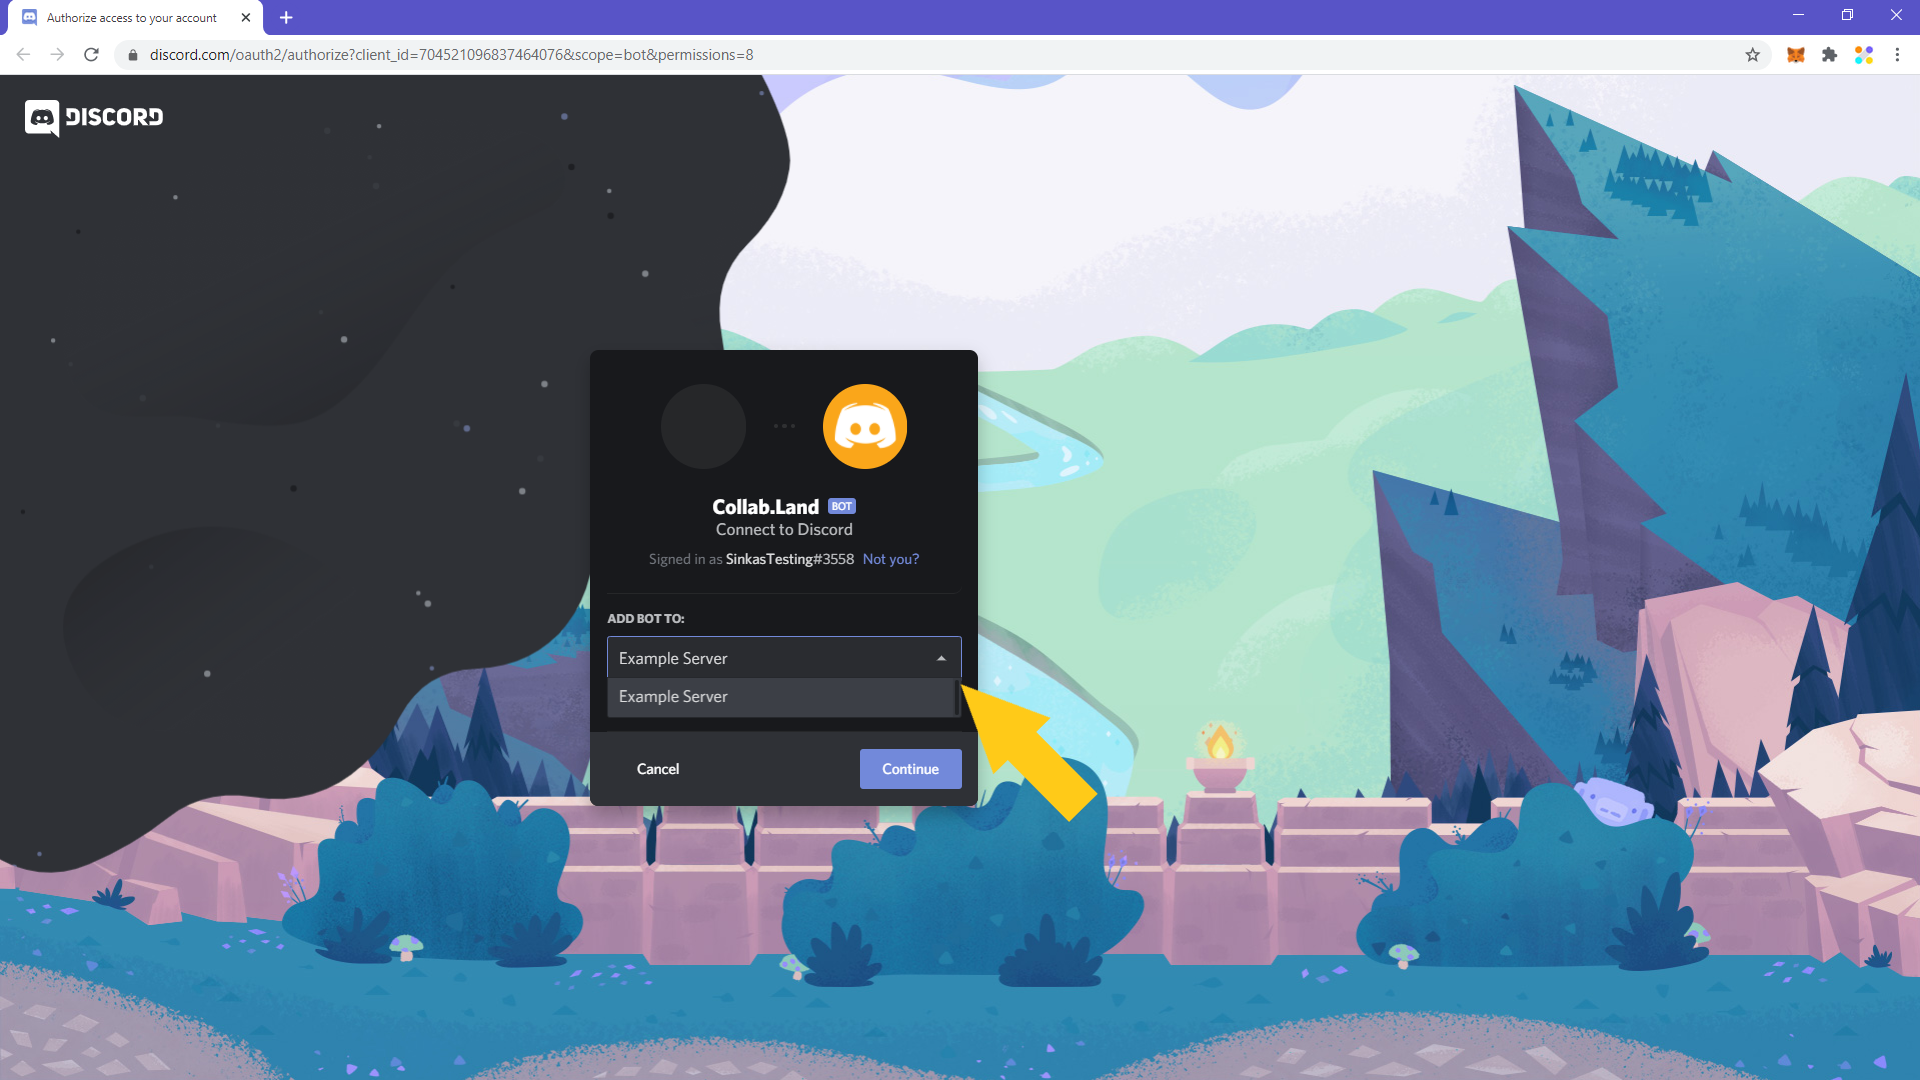
1. Invite the Collab.Land bot to your server through this link. Select the server you want to add the bot to in the drop-down menu that exists on the panel and click “Continue”.
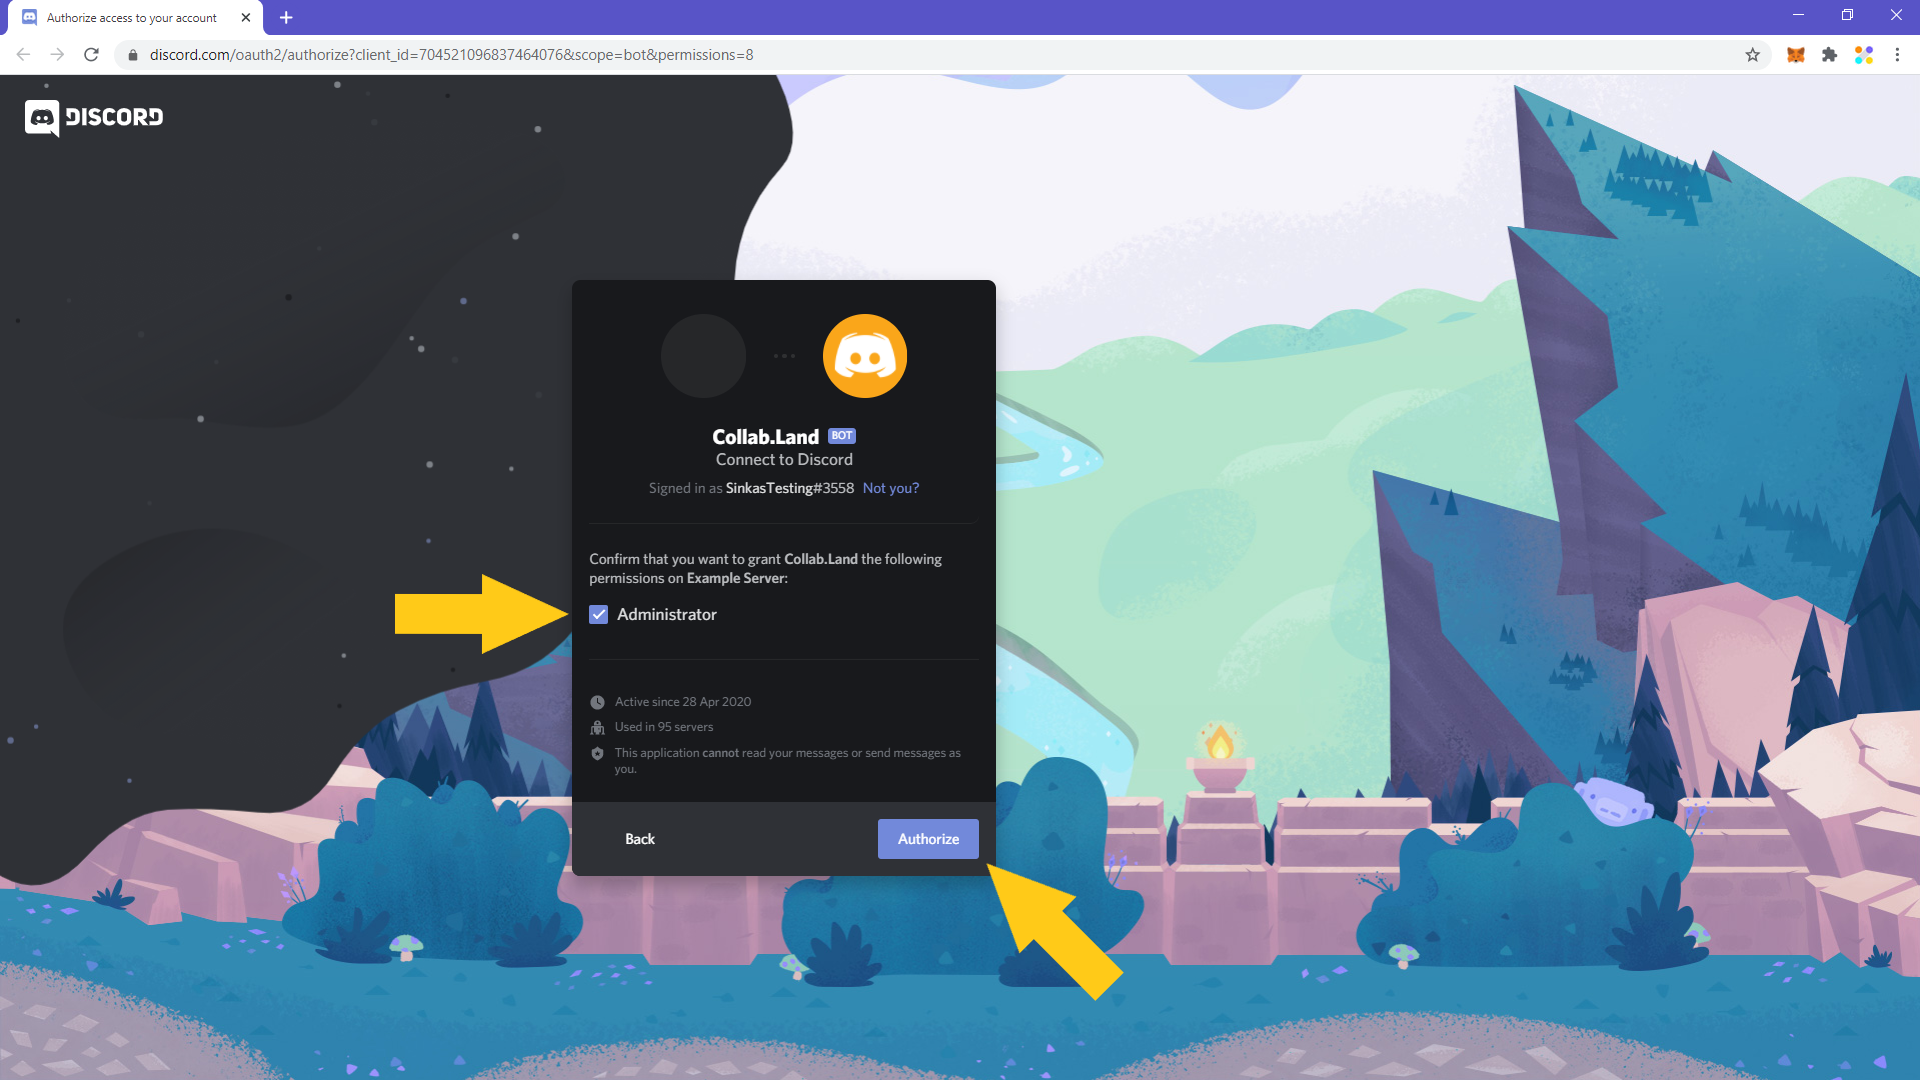
2. Authorize the bot and make sure that the “Administrator” permissions are ticked.
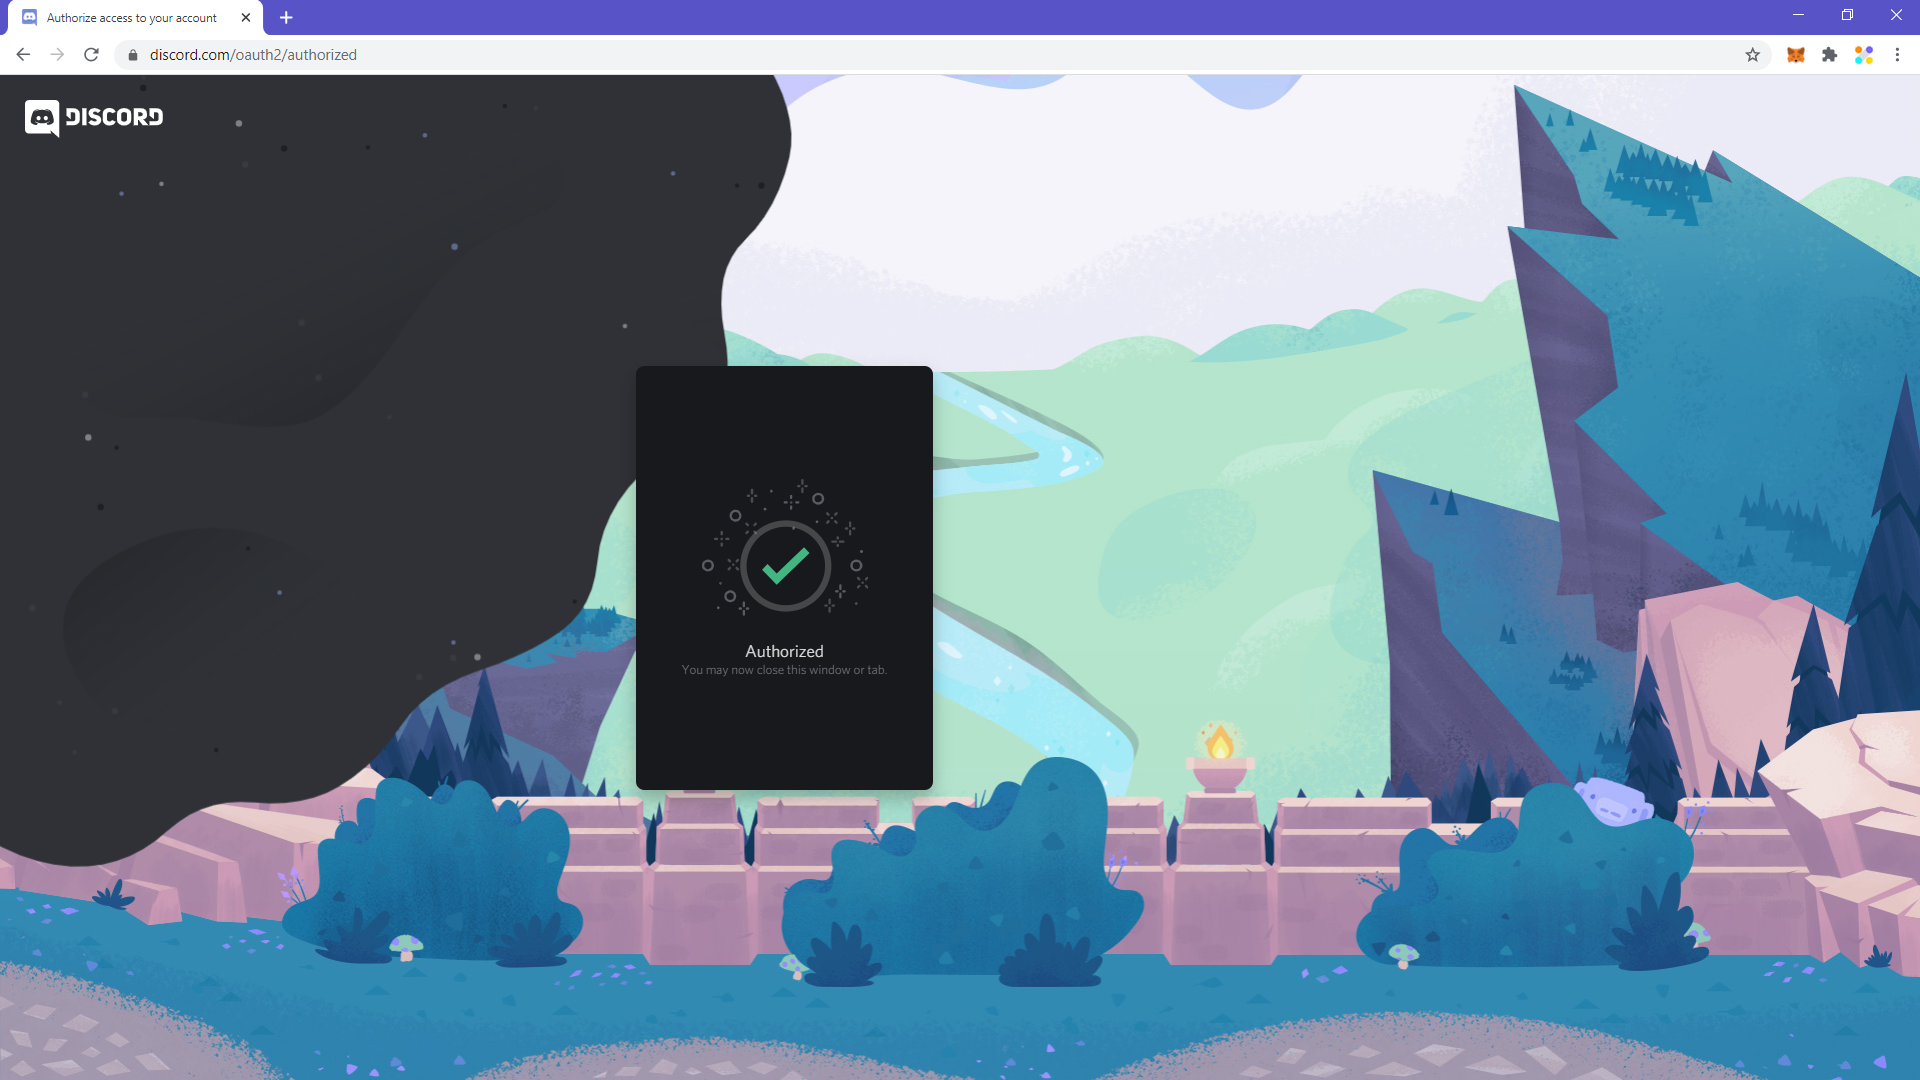
3. After you’ve passed the CAPTCHA check, you’ll get a confirmation message letting you know that the bot has been authorised on your server. You can close this window and head back to Discord.
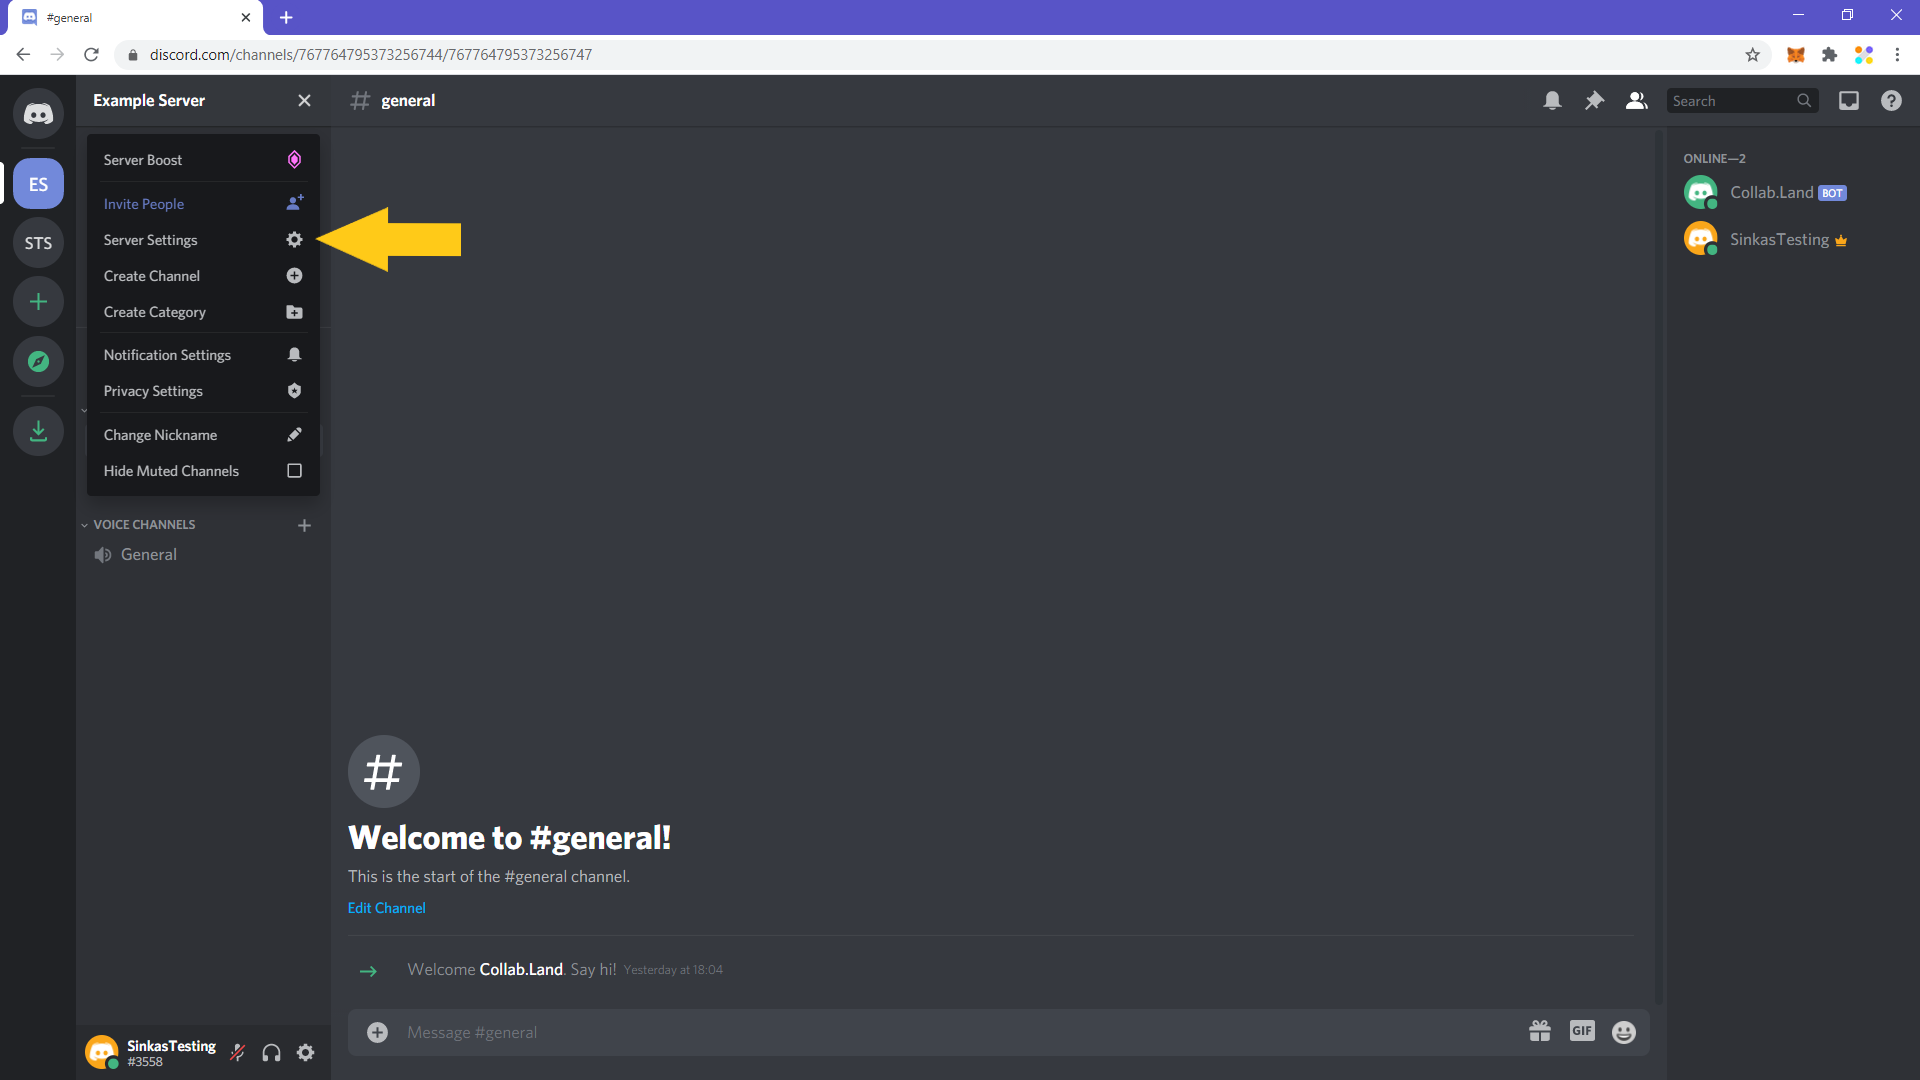
4. Once you’re back on the Discord server, you’ll see a message welcoming the bot on the server. That’s an extra confirmation that the bot was added to the server successfully. Now you have to set-up the roles that the bot will be assigning to users who hold your social token. Click on the server’s name on the top right corner.

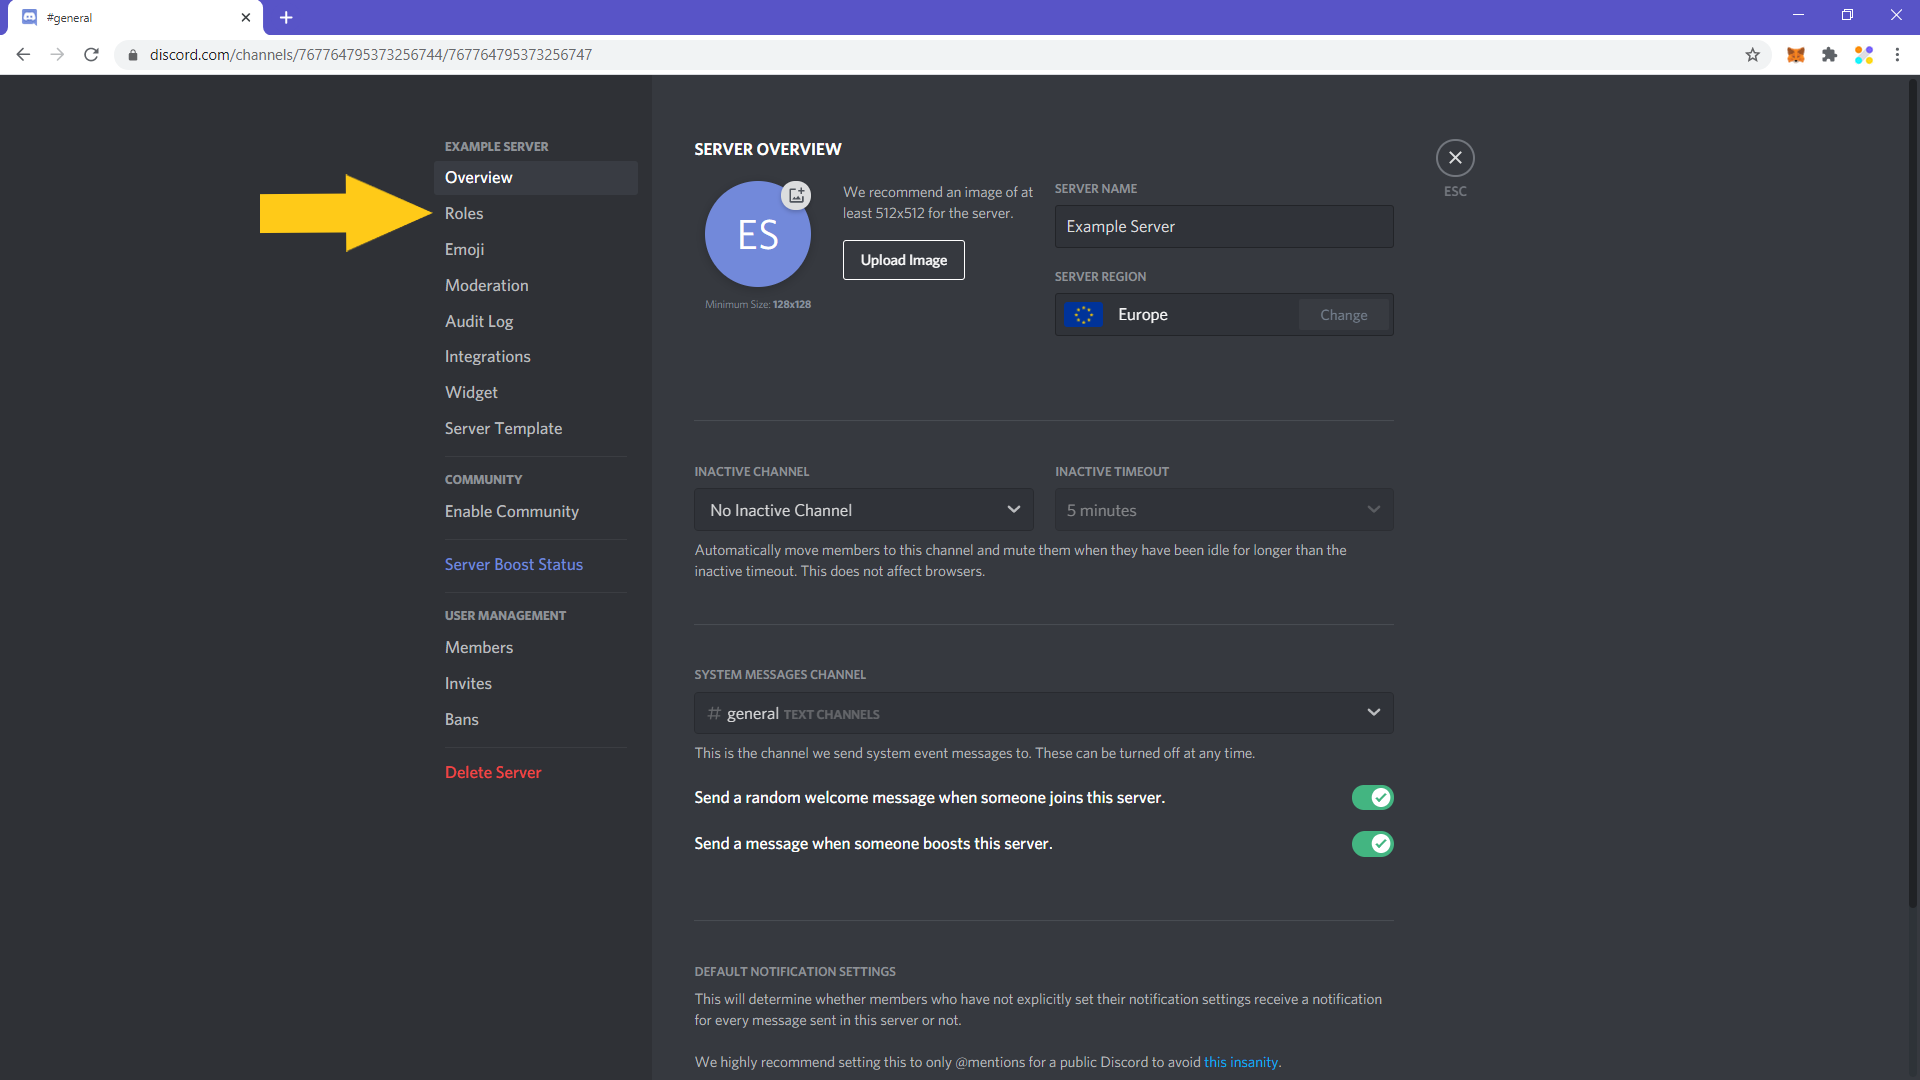
5. From the drop-down menu that will appear, select “Server Settings”.
6. Click on “Roles” on the settings menu.
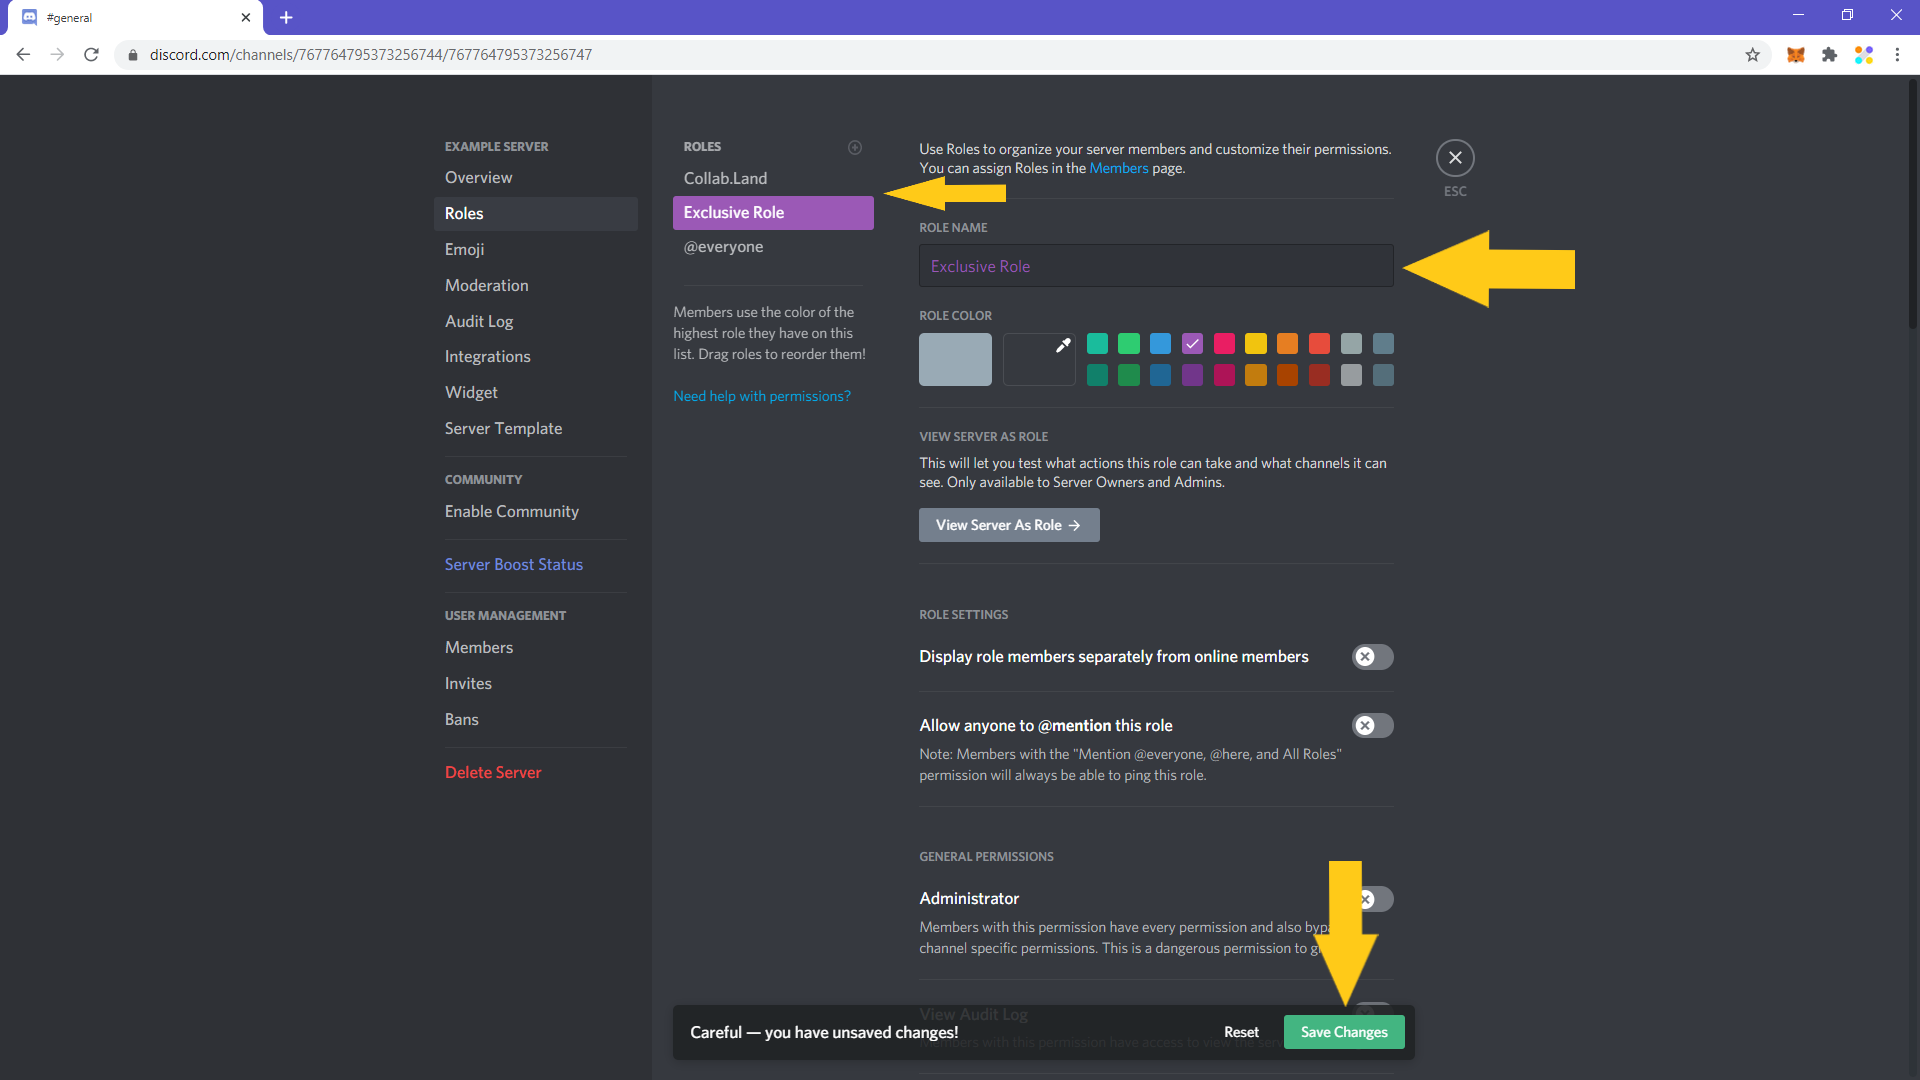
7. Click on the little cross (“+”) icon right above the existing roles to add a new role.

8. Fill in the name and select the colour of the role you’ll add. Make sure that it’s below the “Collab.Land” role hierarchically. If it’s not then drag-’n-drop it in place. Once you’re done, click on “Save Changes”.
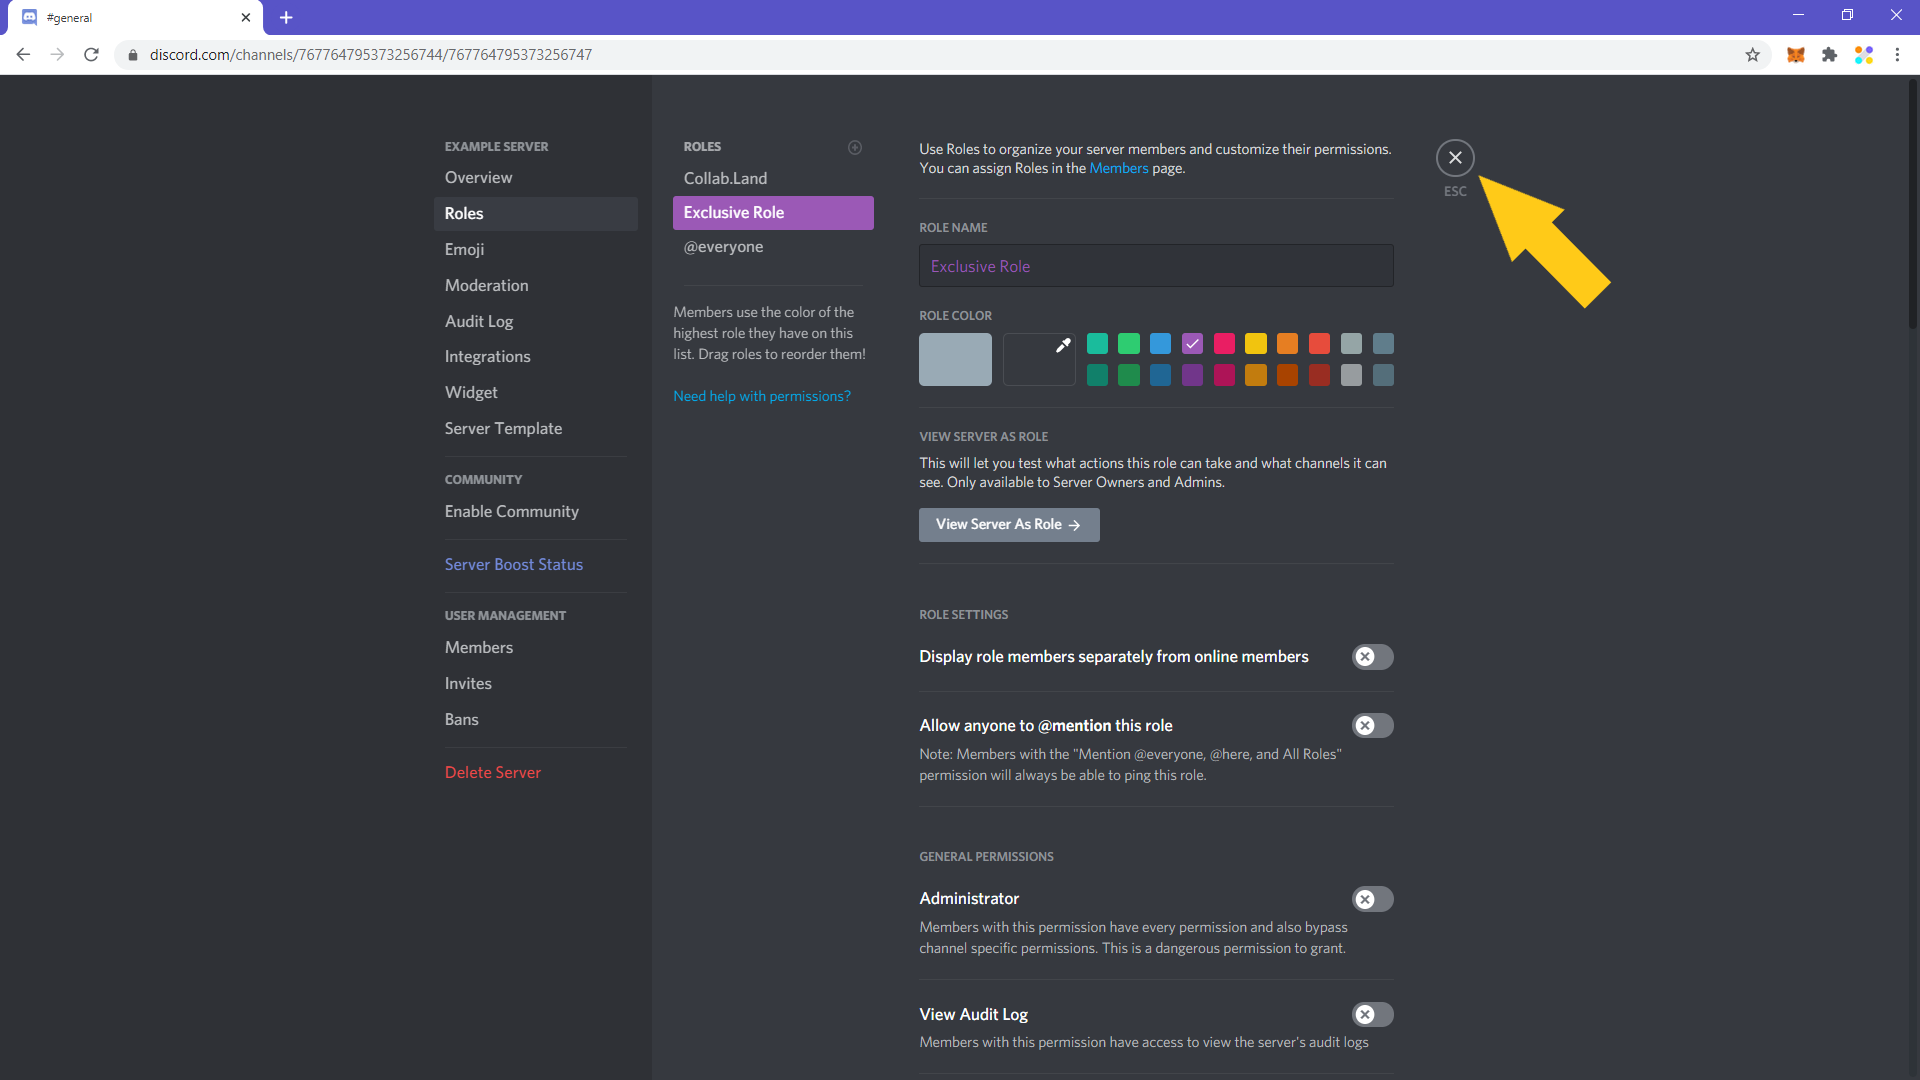
9. Click on the “X” on the top right corner or simply click escape to go back to the server’s main page.
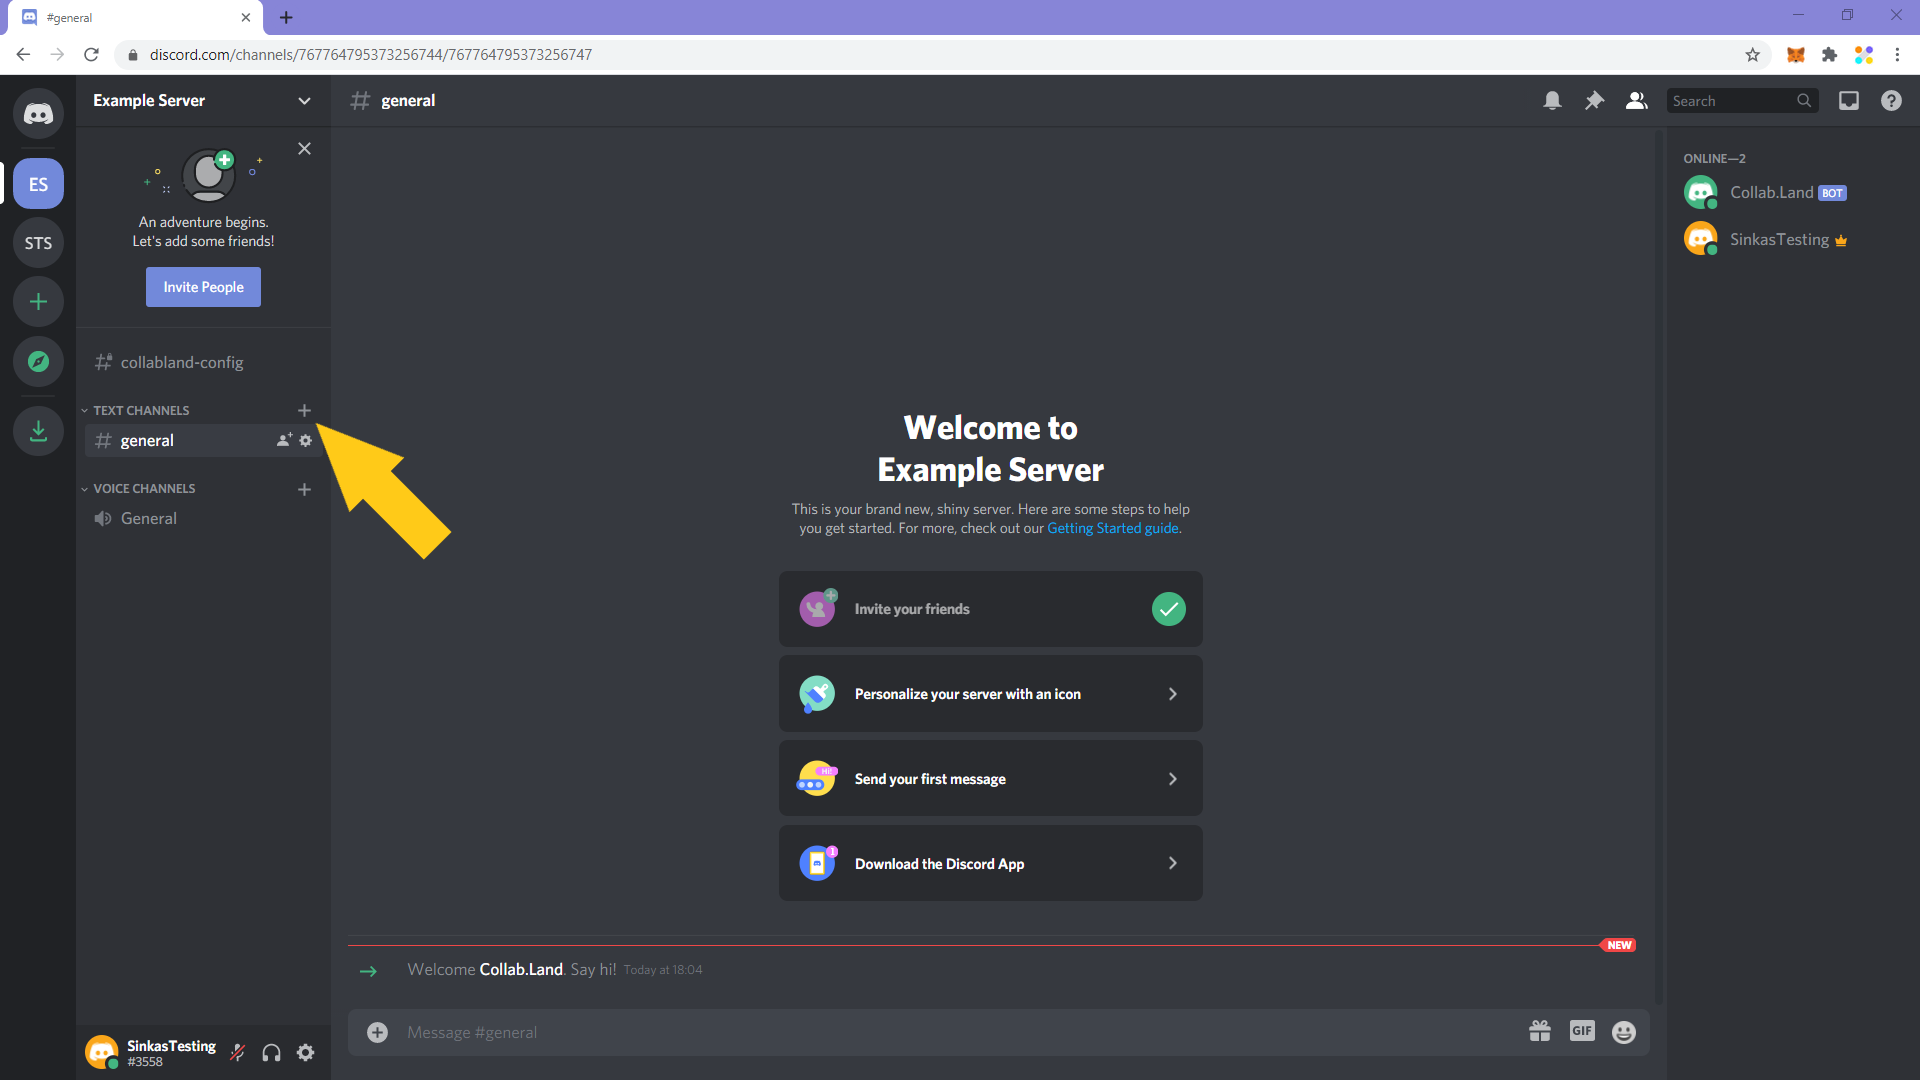
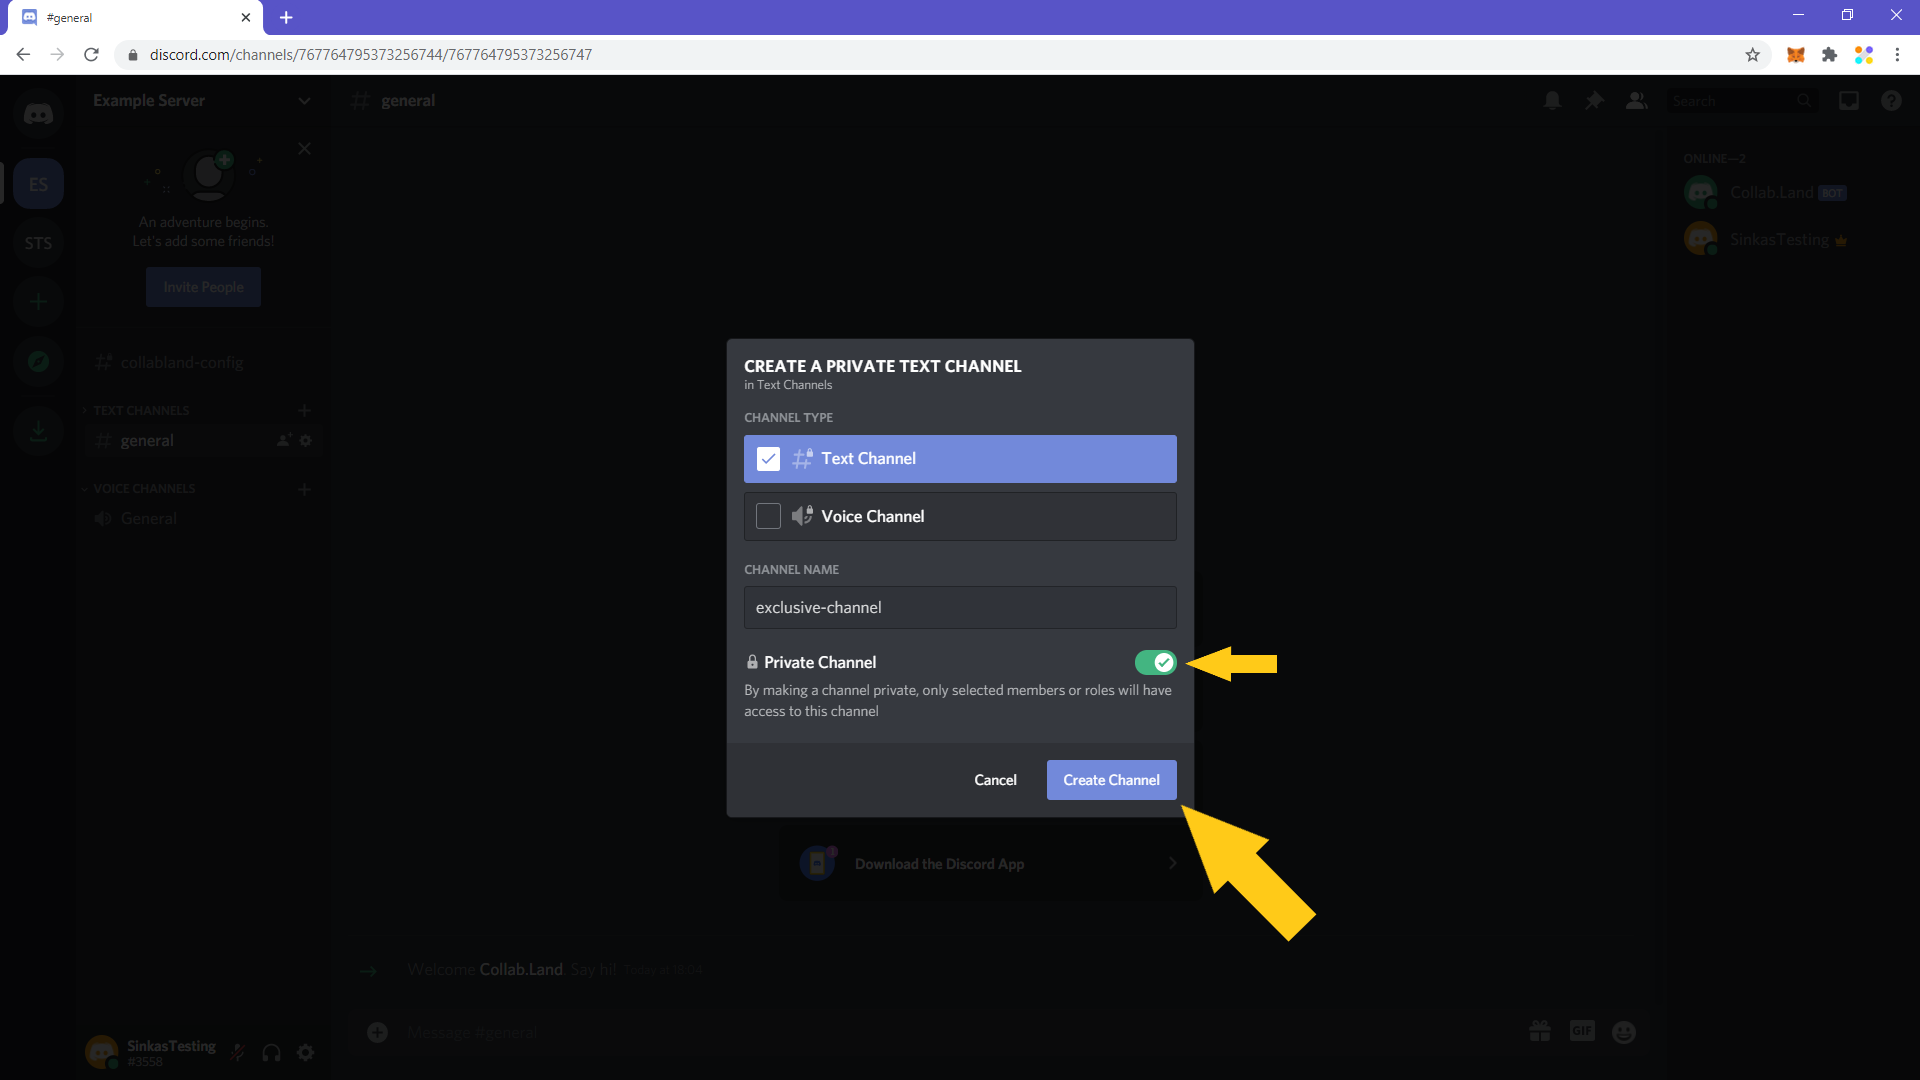
10. Now you have to create the exclusive channel. Click on the little cross (“+”) icon right next to “Text Channels” on the server navigation bar.
11. On the pop-up that will appear, write the name, make sure the “Private Channel” toggle is on and click “Create Channel”.
12. Select the role you created in the previous steps and make sure you also select “Collab.Land”. Click “Done” and the channel will be created.

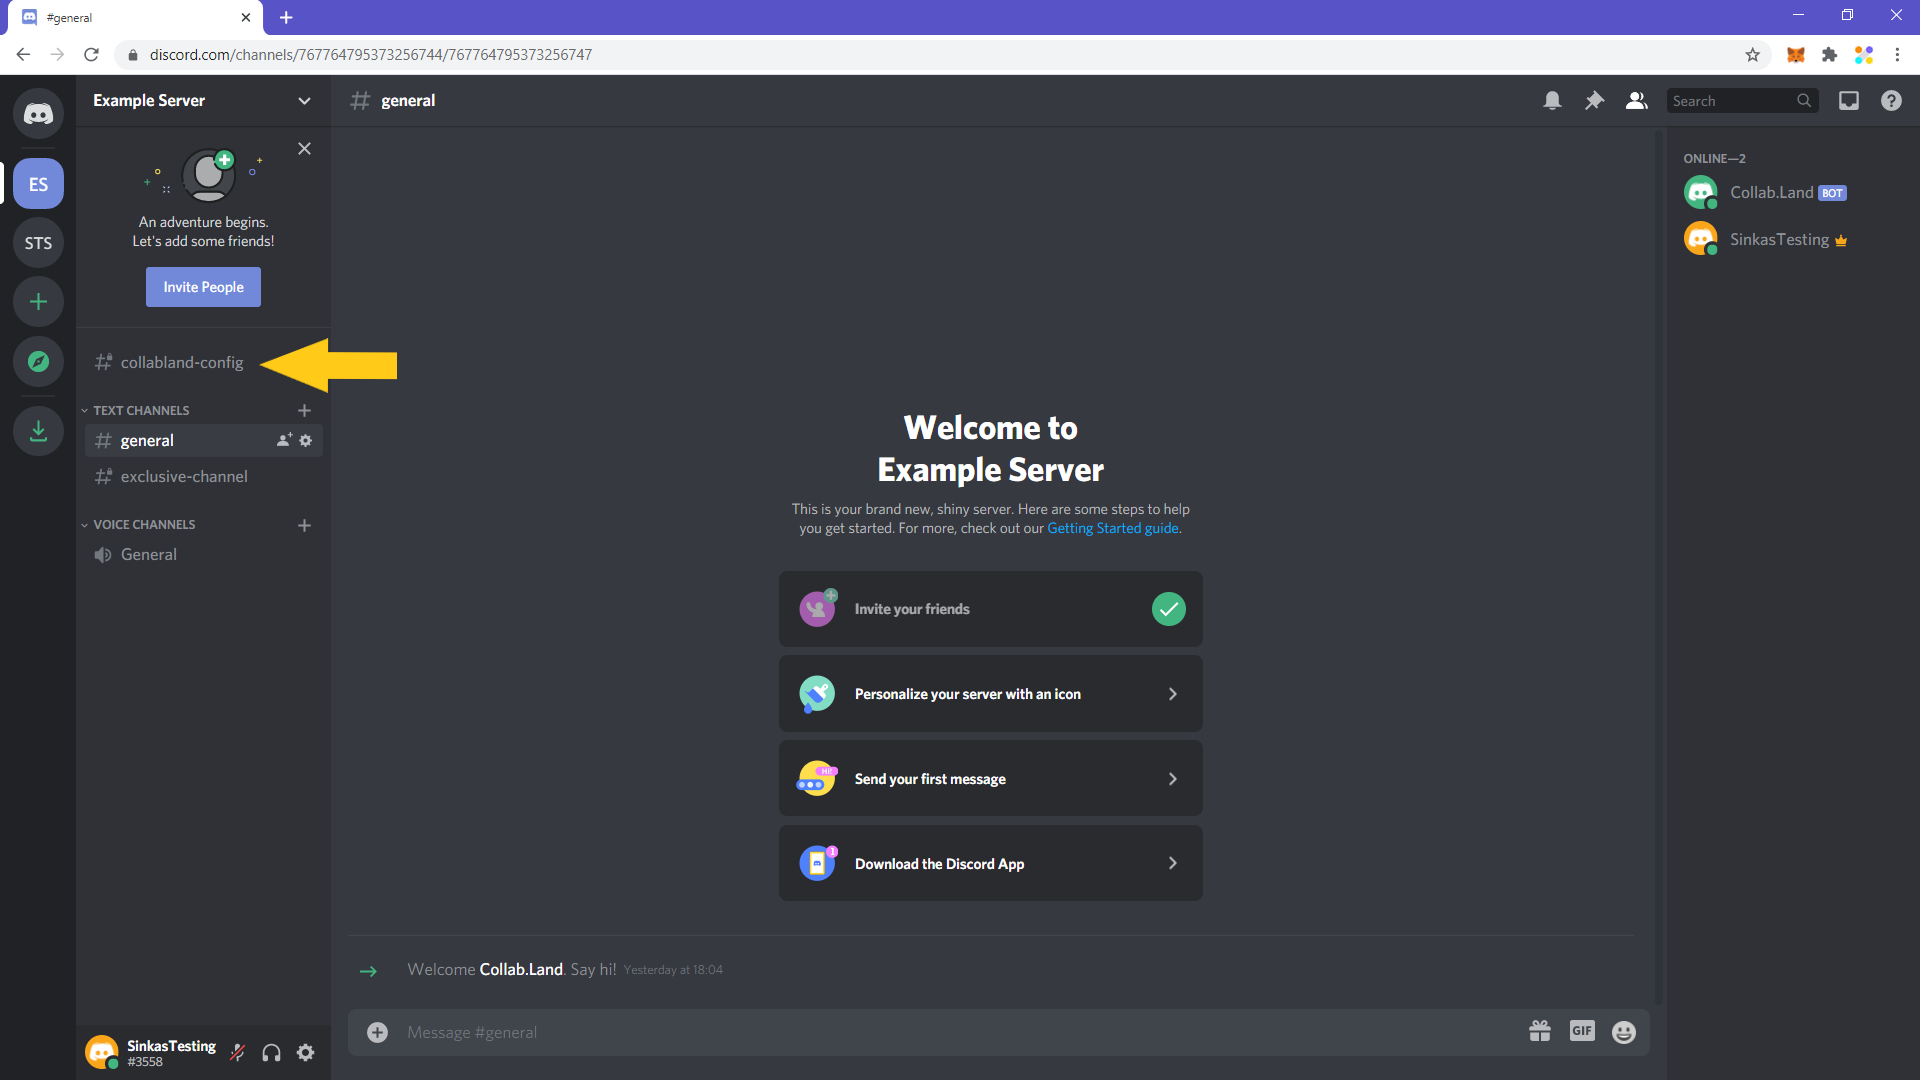
13. For the final step, you have to make it so anyone who comes in the server, and holds the required amount of social tokens that you’ll set, can be assigned that role so they can get access to the private channel. To do that, go to the “collabland-config” channel.
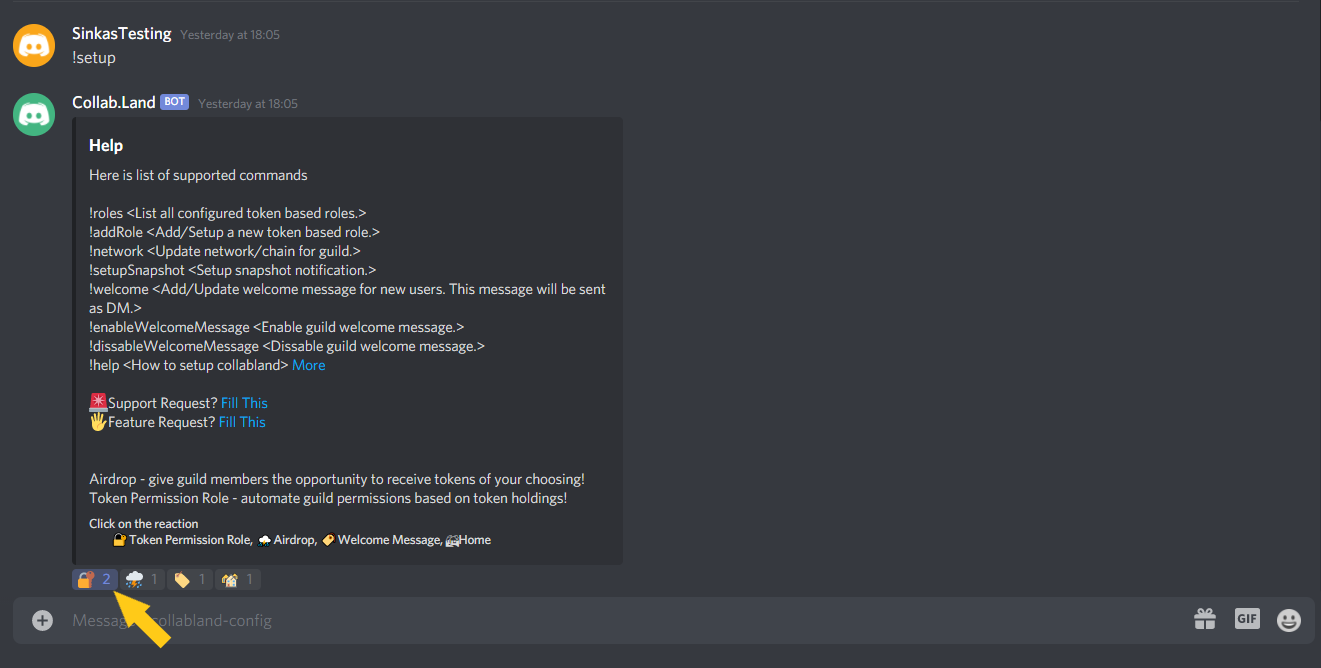
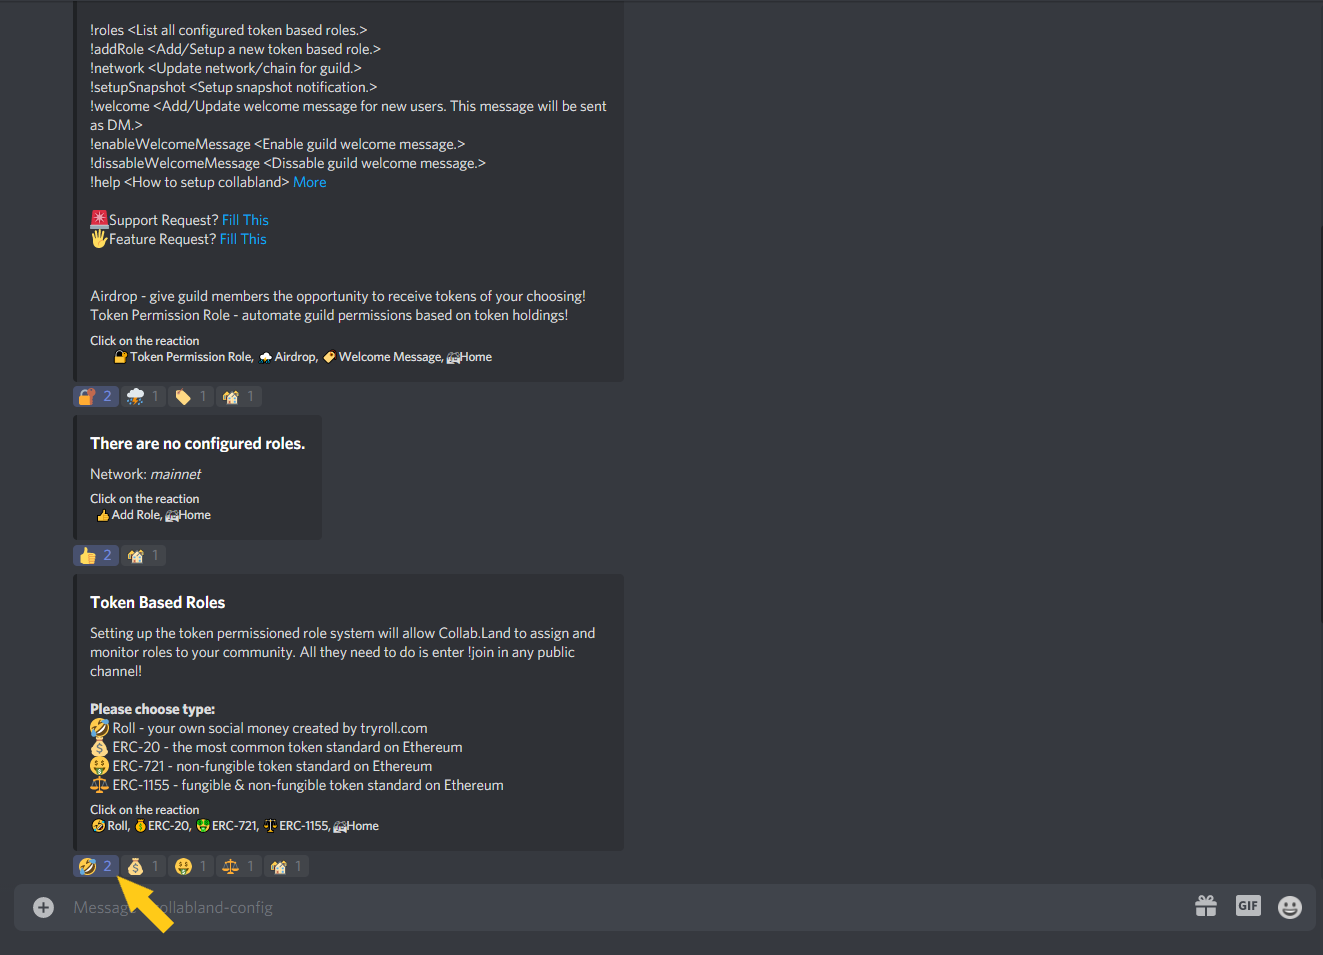
14. Once you're in that channel, type “!setup” and the Collab.Land bot will respond with the set-up options. Click on the padlock emoji (🔐) to start setting up the token permissioned role.
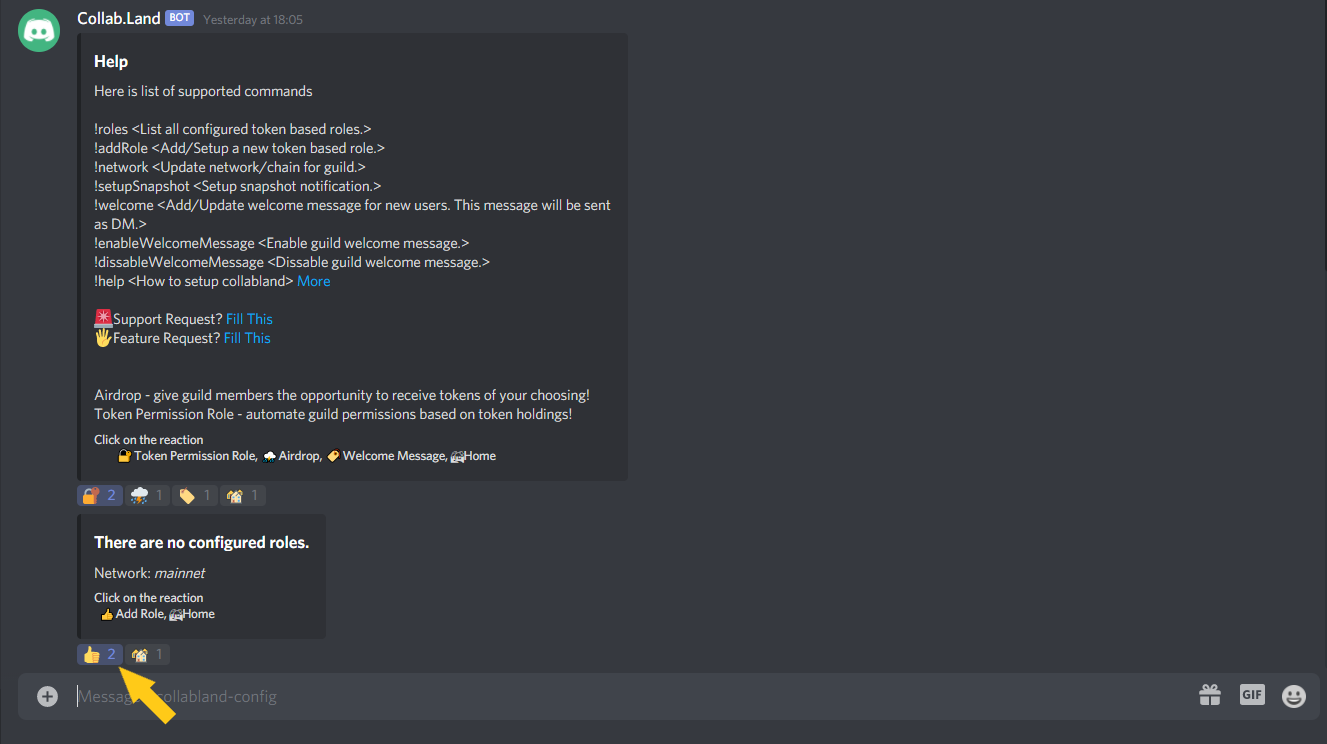
15. For the next message, click on the thumbs up emoji (👍).
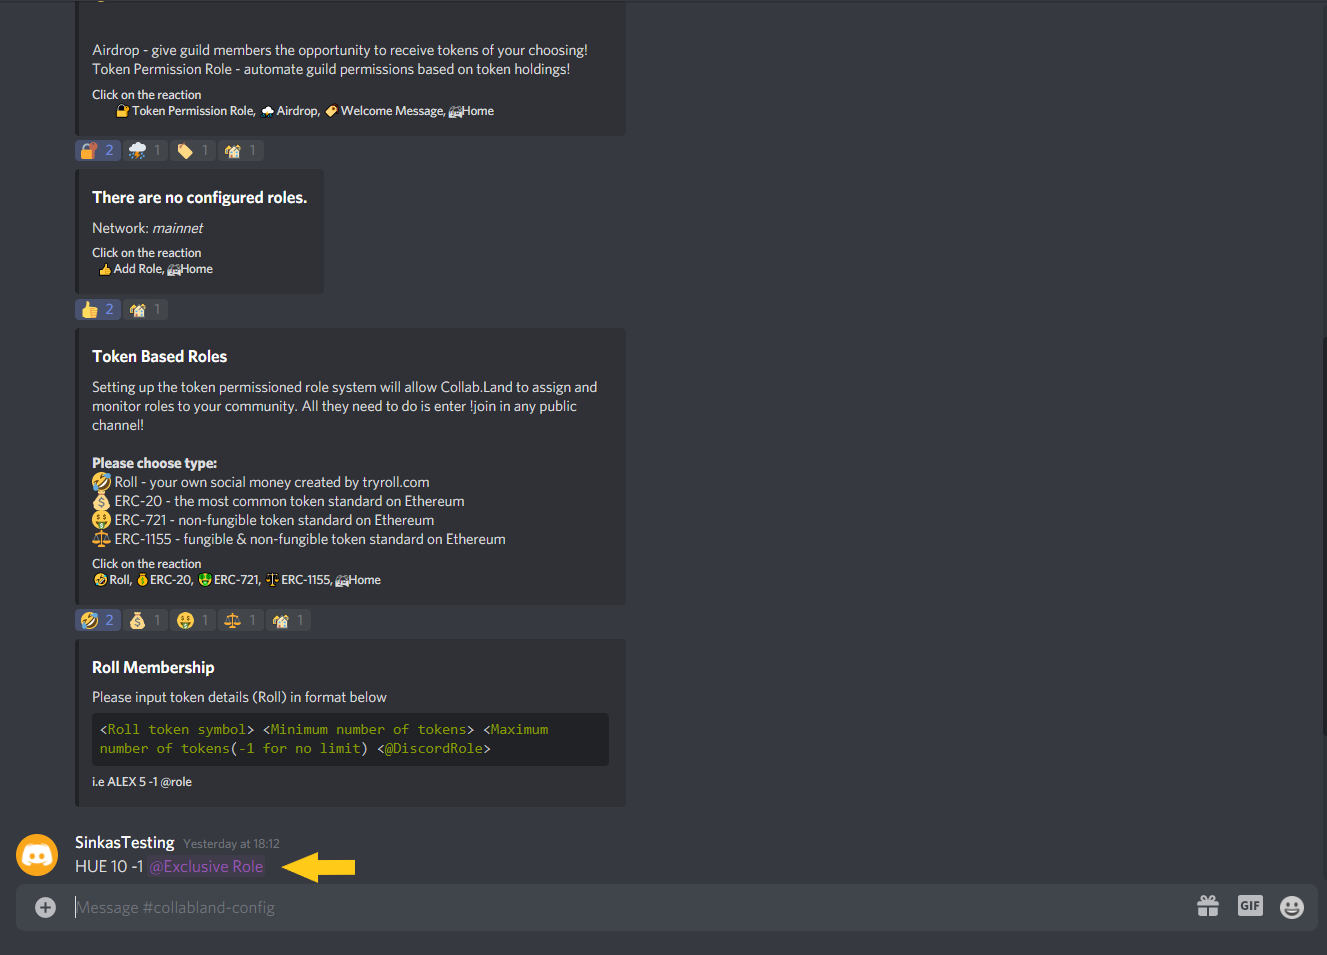
16. You’ll then have to select what kind of token you’ll be using. Click on the ROFL emoji (🤣) for Roll's social money.
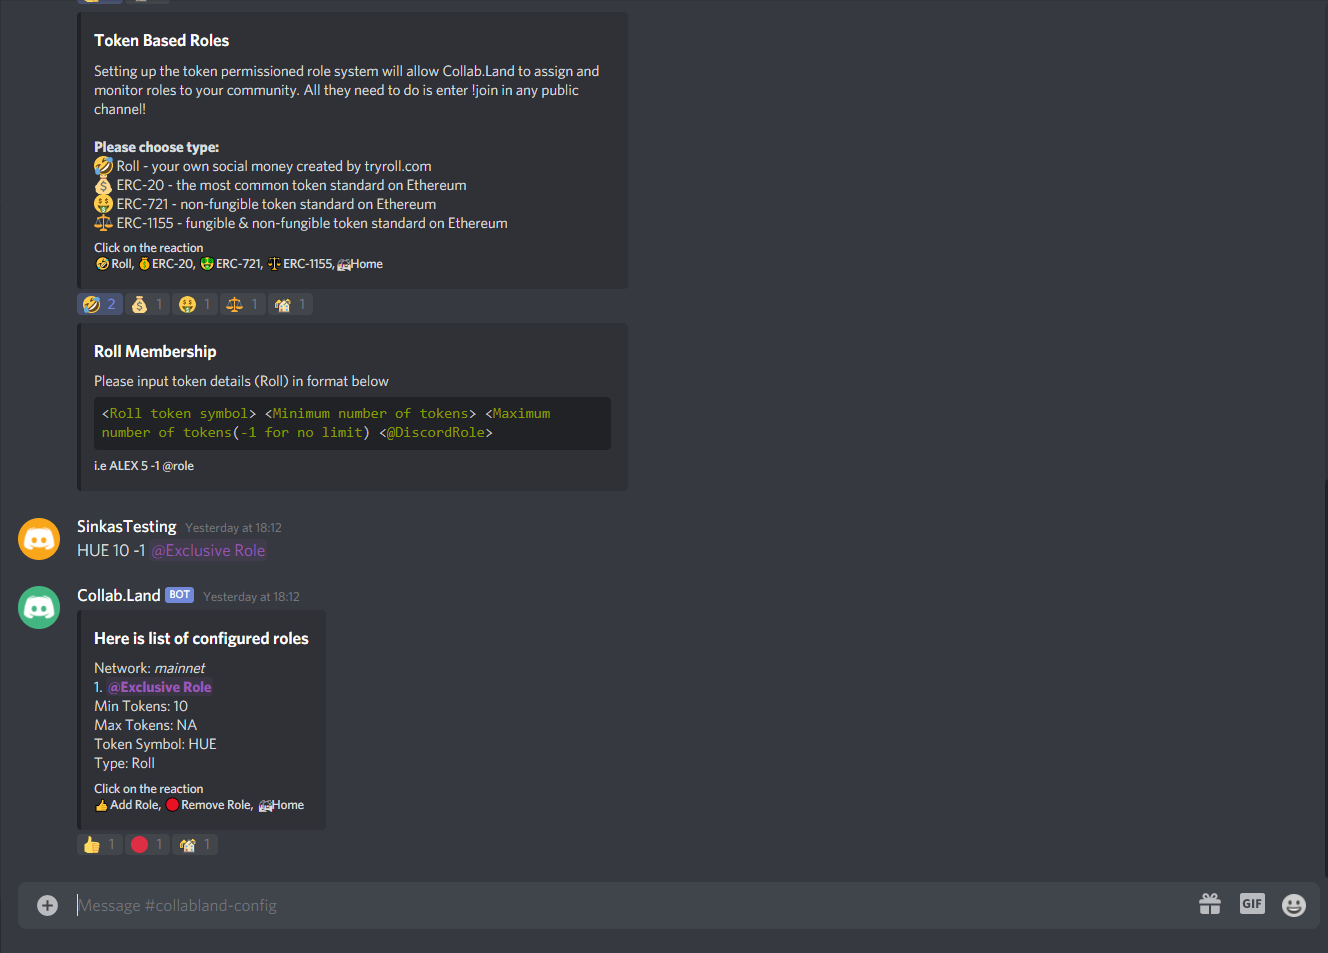
17. You then have to type the token’s ticker, the amount of tokens one would need to have to get the role, the upper limit (-1 for no limit) and the role that they’ll be getting. In this example, users will need to have at least 10 HUE in order to be getting the Exclusive Role.
18. You’ll see a panel of the configured roles once you do that successfully and you’re all set. You can repeat the steps to create multiple roles and channels, with different holding requirements.
Comments
Article is closed for comments.