
If you want to further support your favourite creator’s social token, you can do so by adding liquidity to their social token through Uniswap. And on top of that, you get to earn some ETH through a proportional share of the transaction fees for the pair you add liquidity to.
See the process below.
Step-by-step guide:
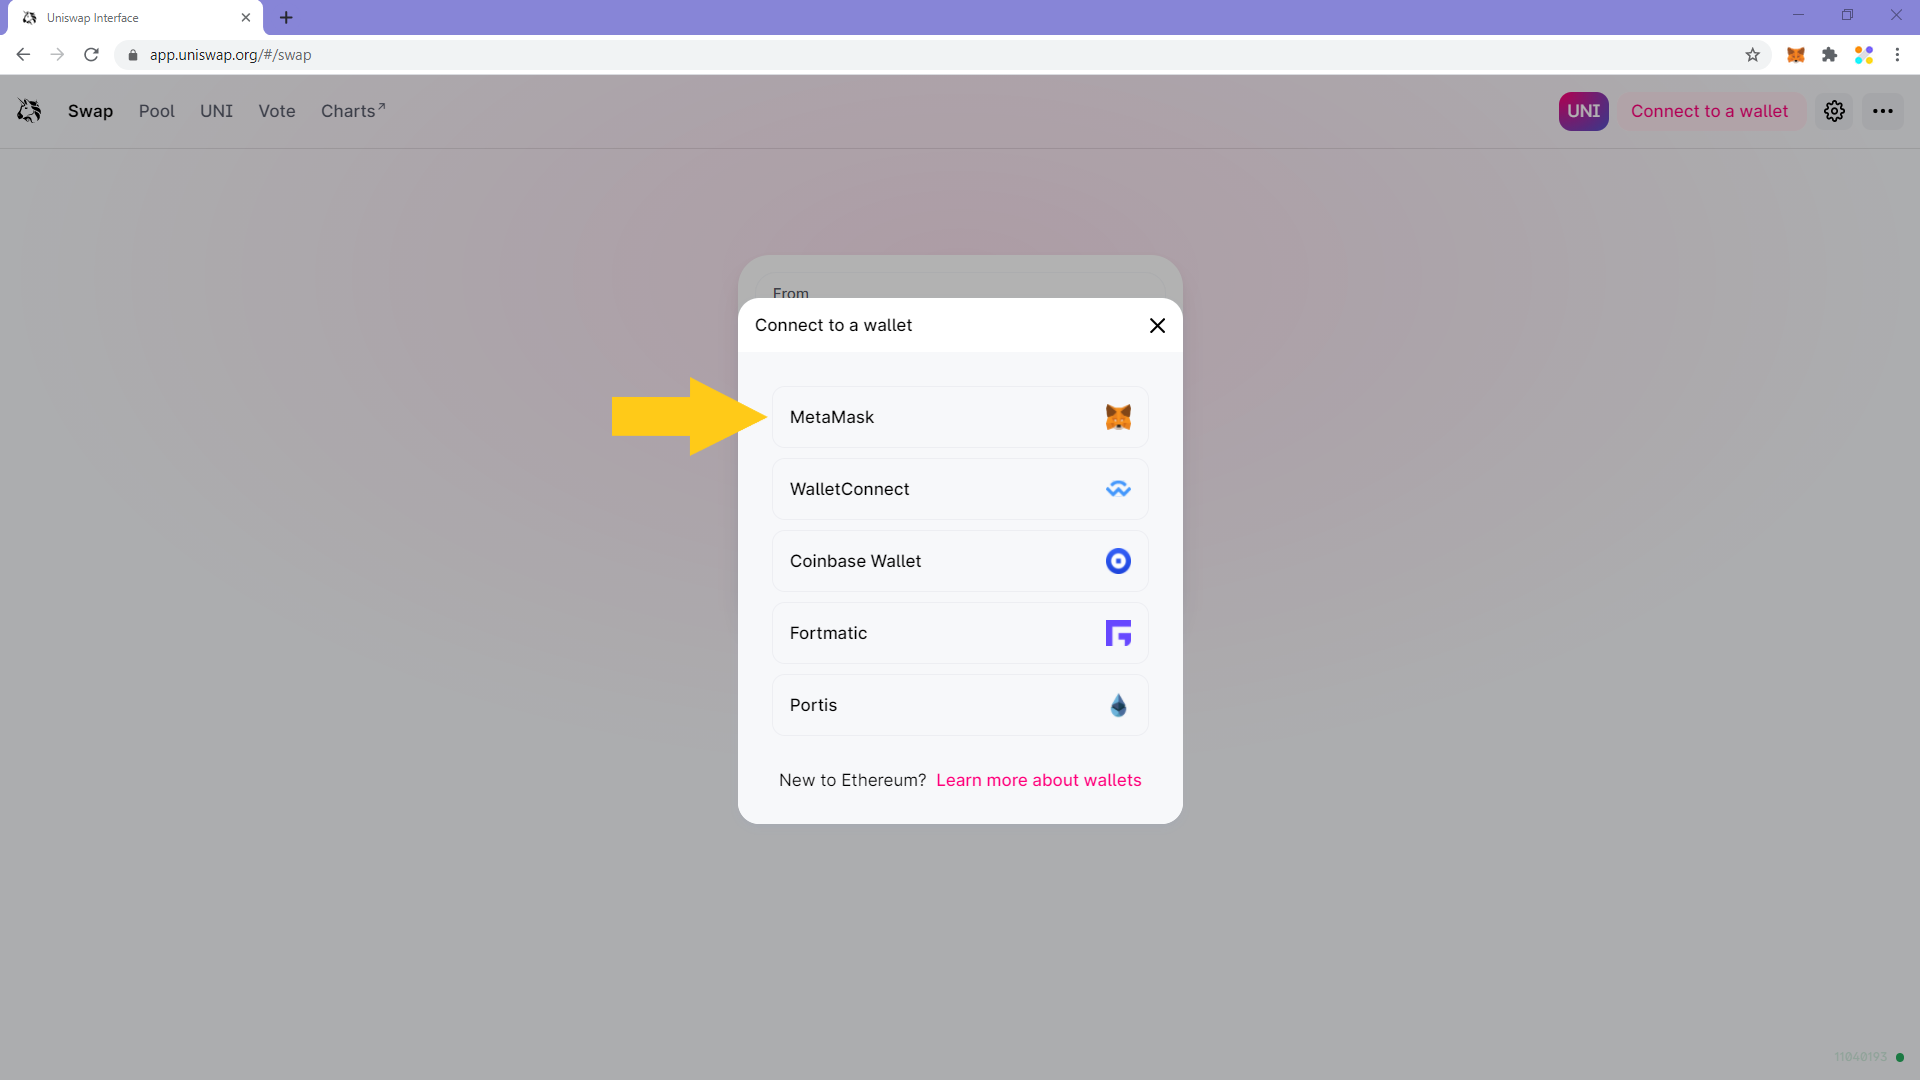
1. Head over to Uniswap’s exchange and click “Connect to a Wallet” on the top right corner.
2. Select the wallet you want to connect with from the ones on the popup window. We’re going to use Metamask in this case.
3. If you’re not already logged in on Metamask, you’ll be asked to log in.
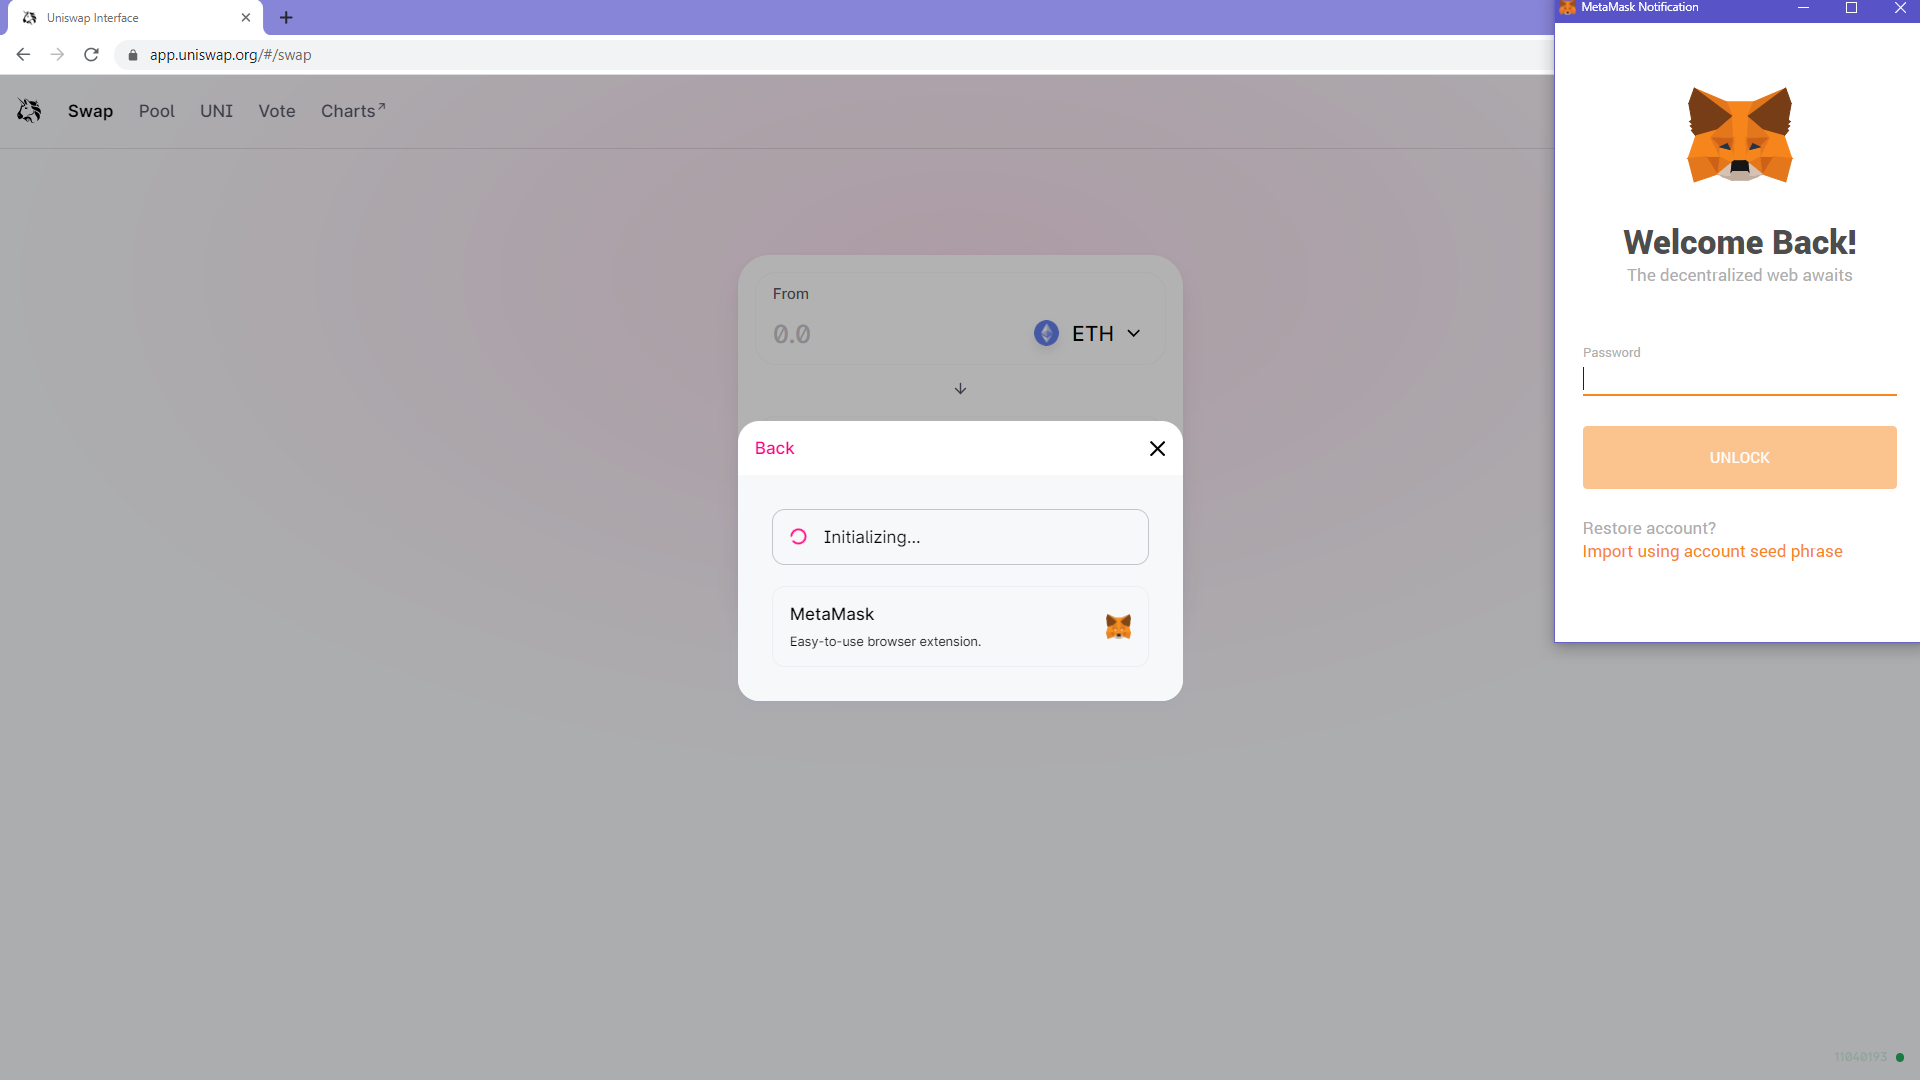
4. If you’re already logged-in, or right after you log-in if you’re not, you’ll be prompted to sign a message to connect your wallet with Uniswap. Click on “Next”.

5. On the next page, click “Connect”. Note that connecting your wallet to Uniswap doesn’t require gas.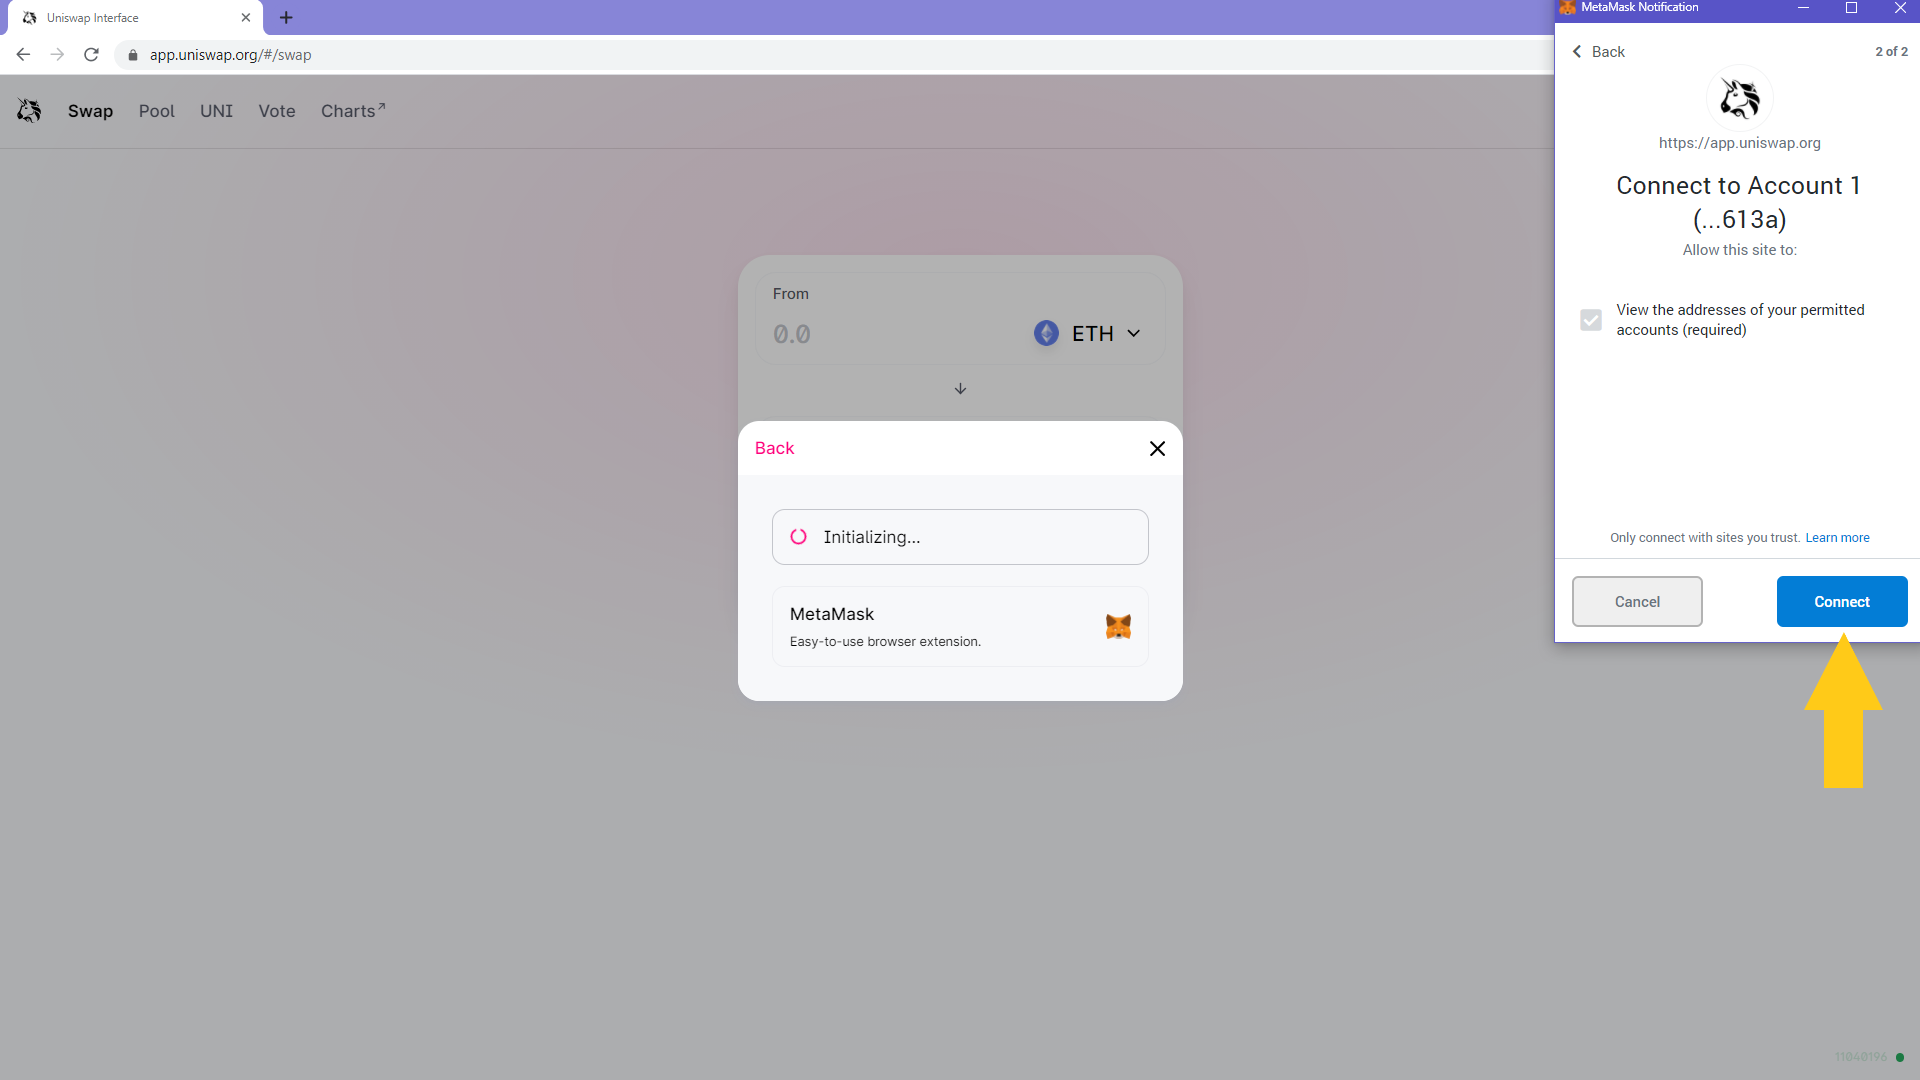
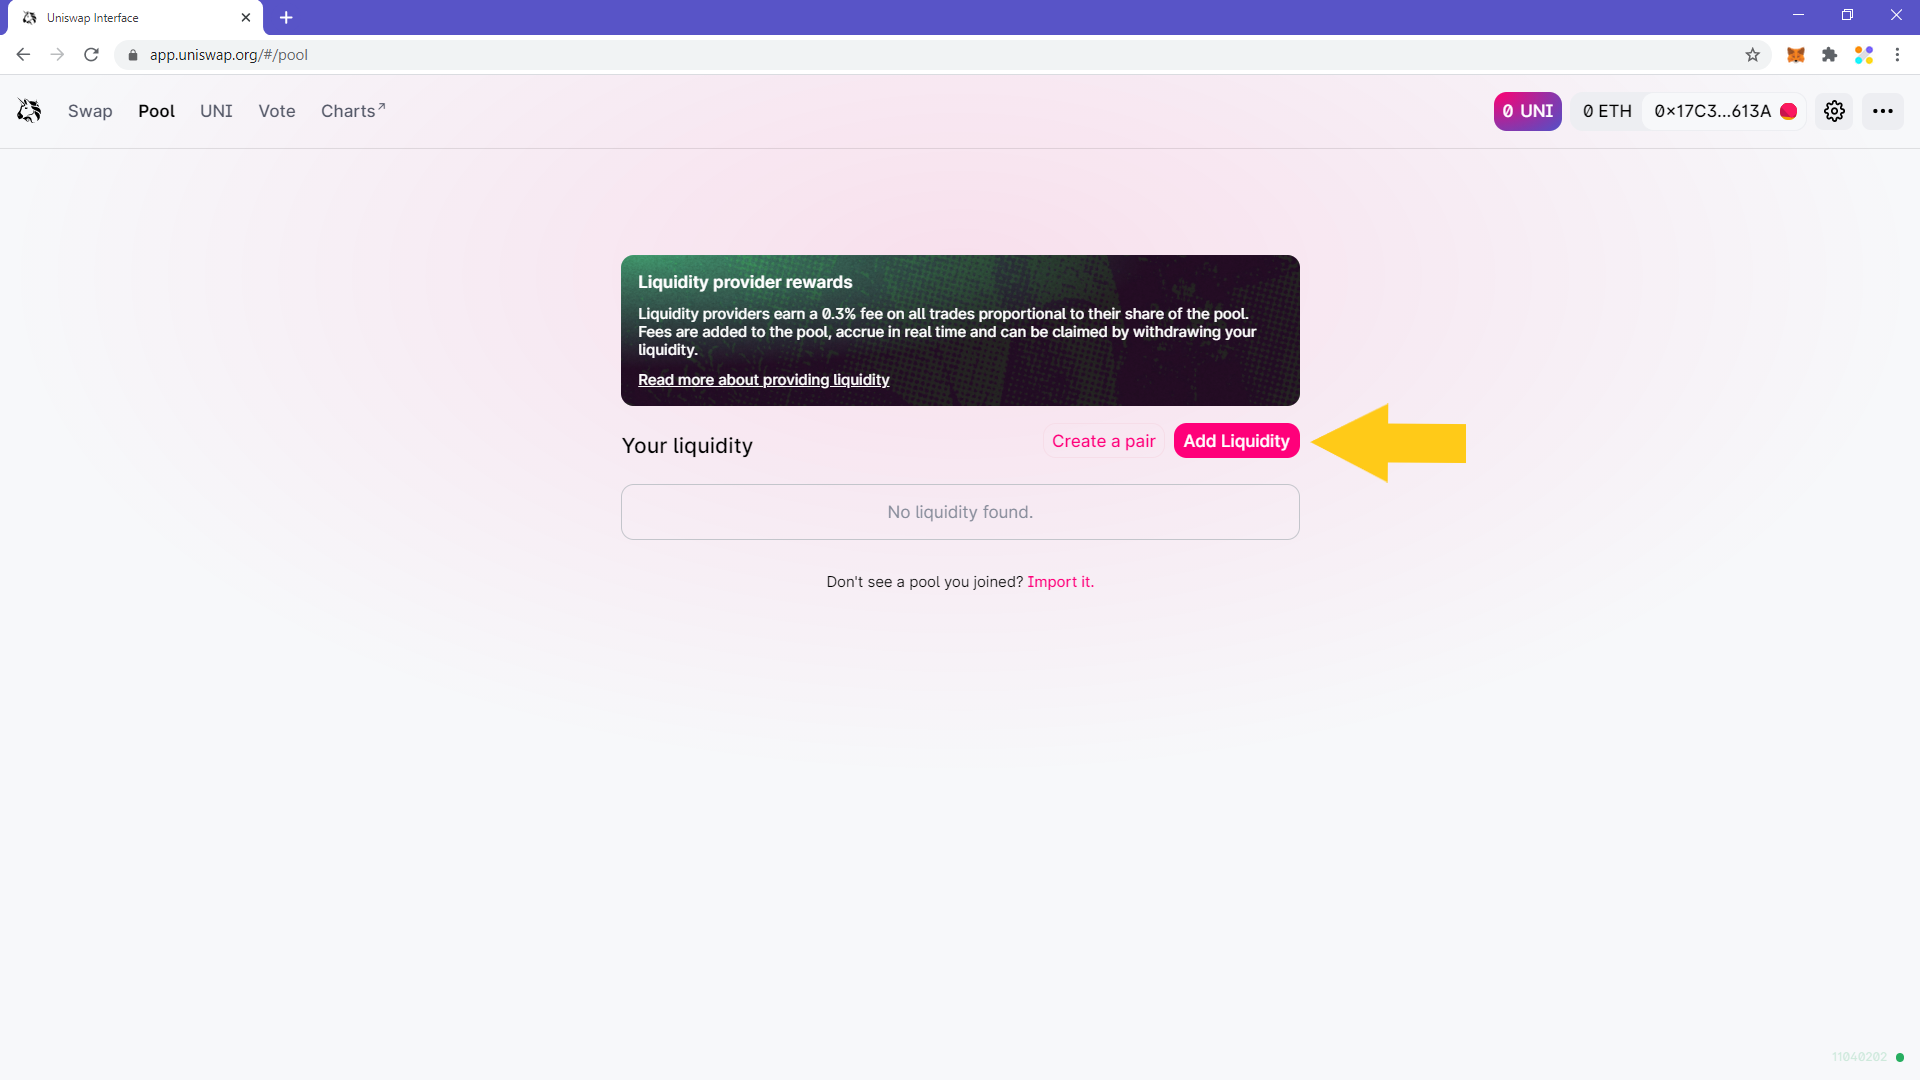
6. Once you’ve connected your wallet, click on “Pool” on the top left corner of your screen.

7. On the next page, click on “Add Liquidity”.
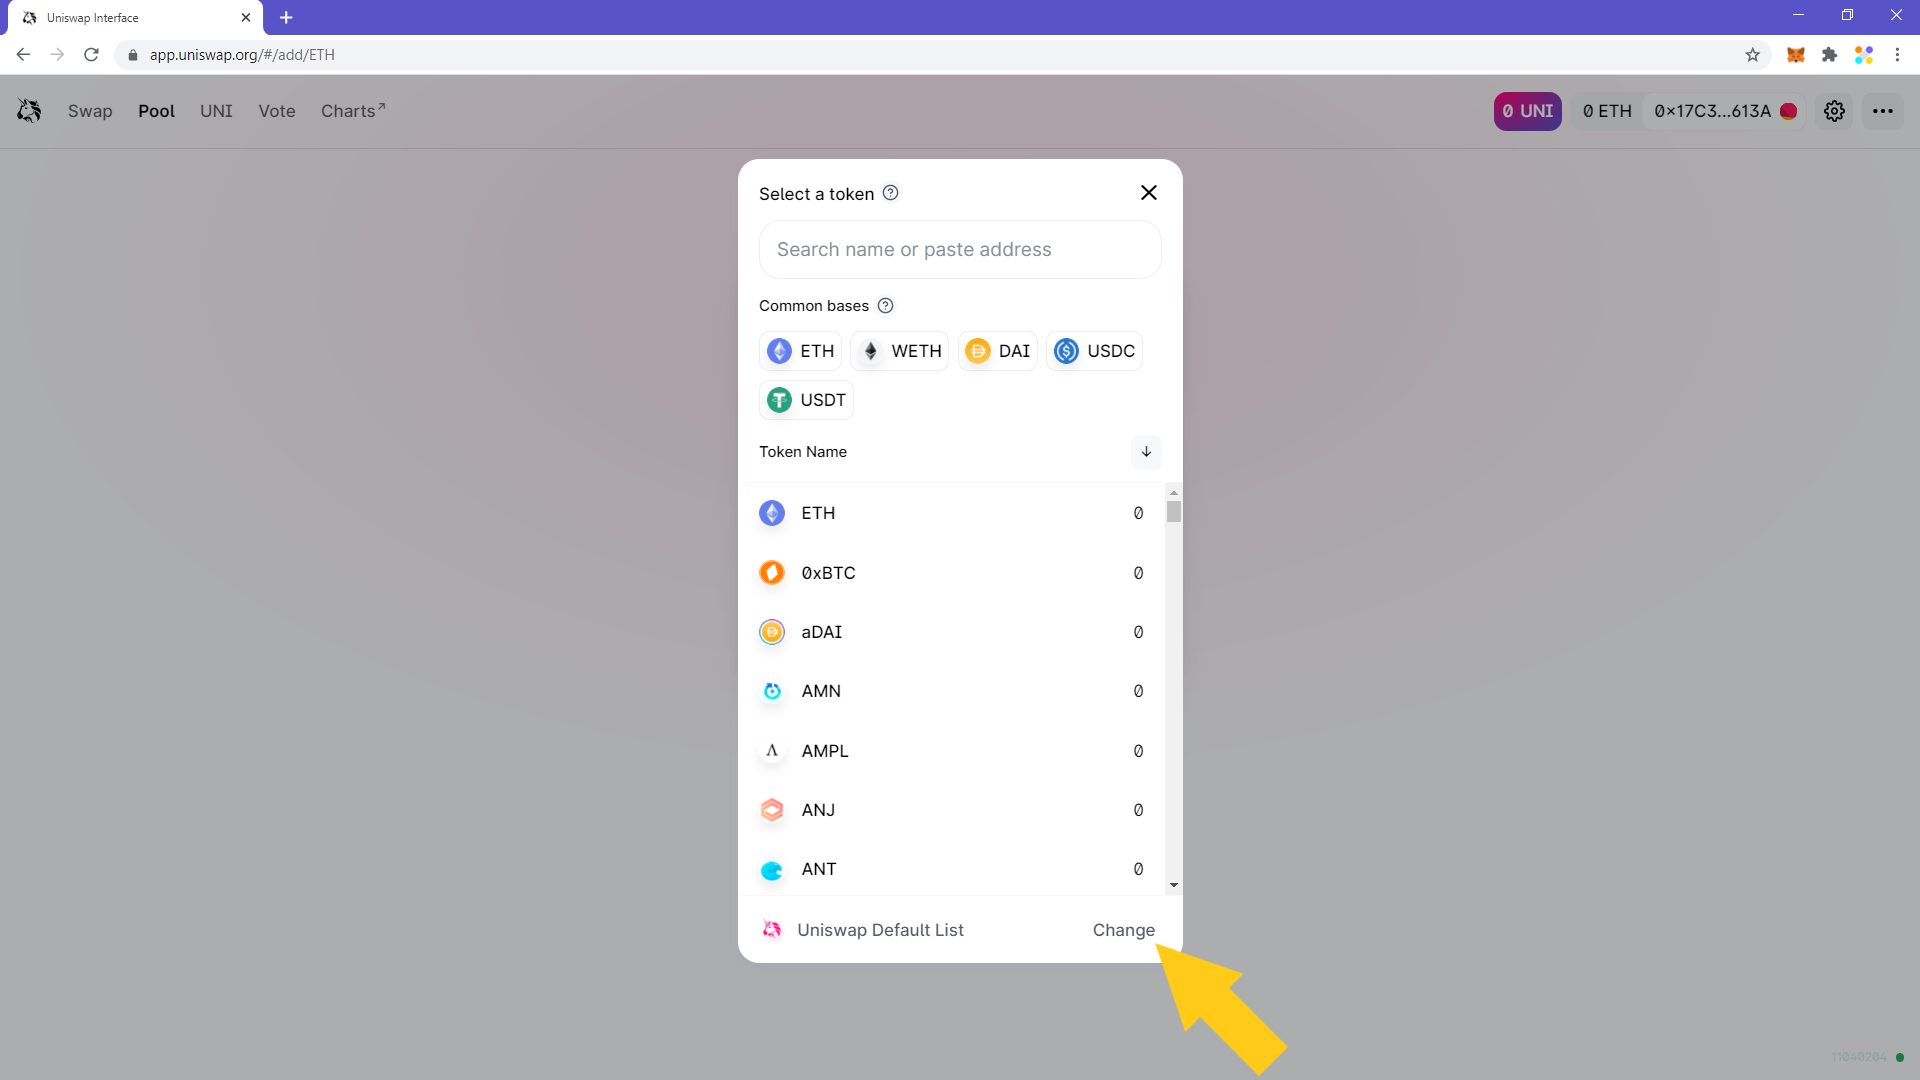
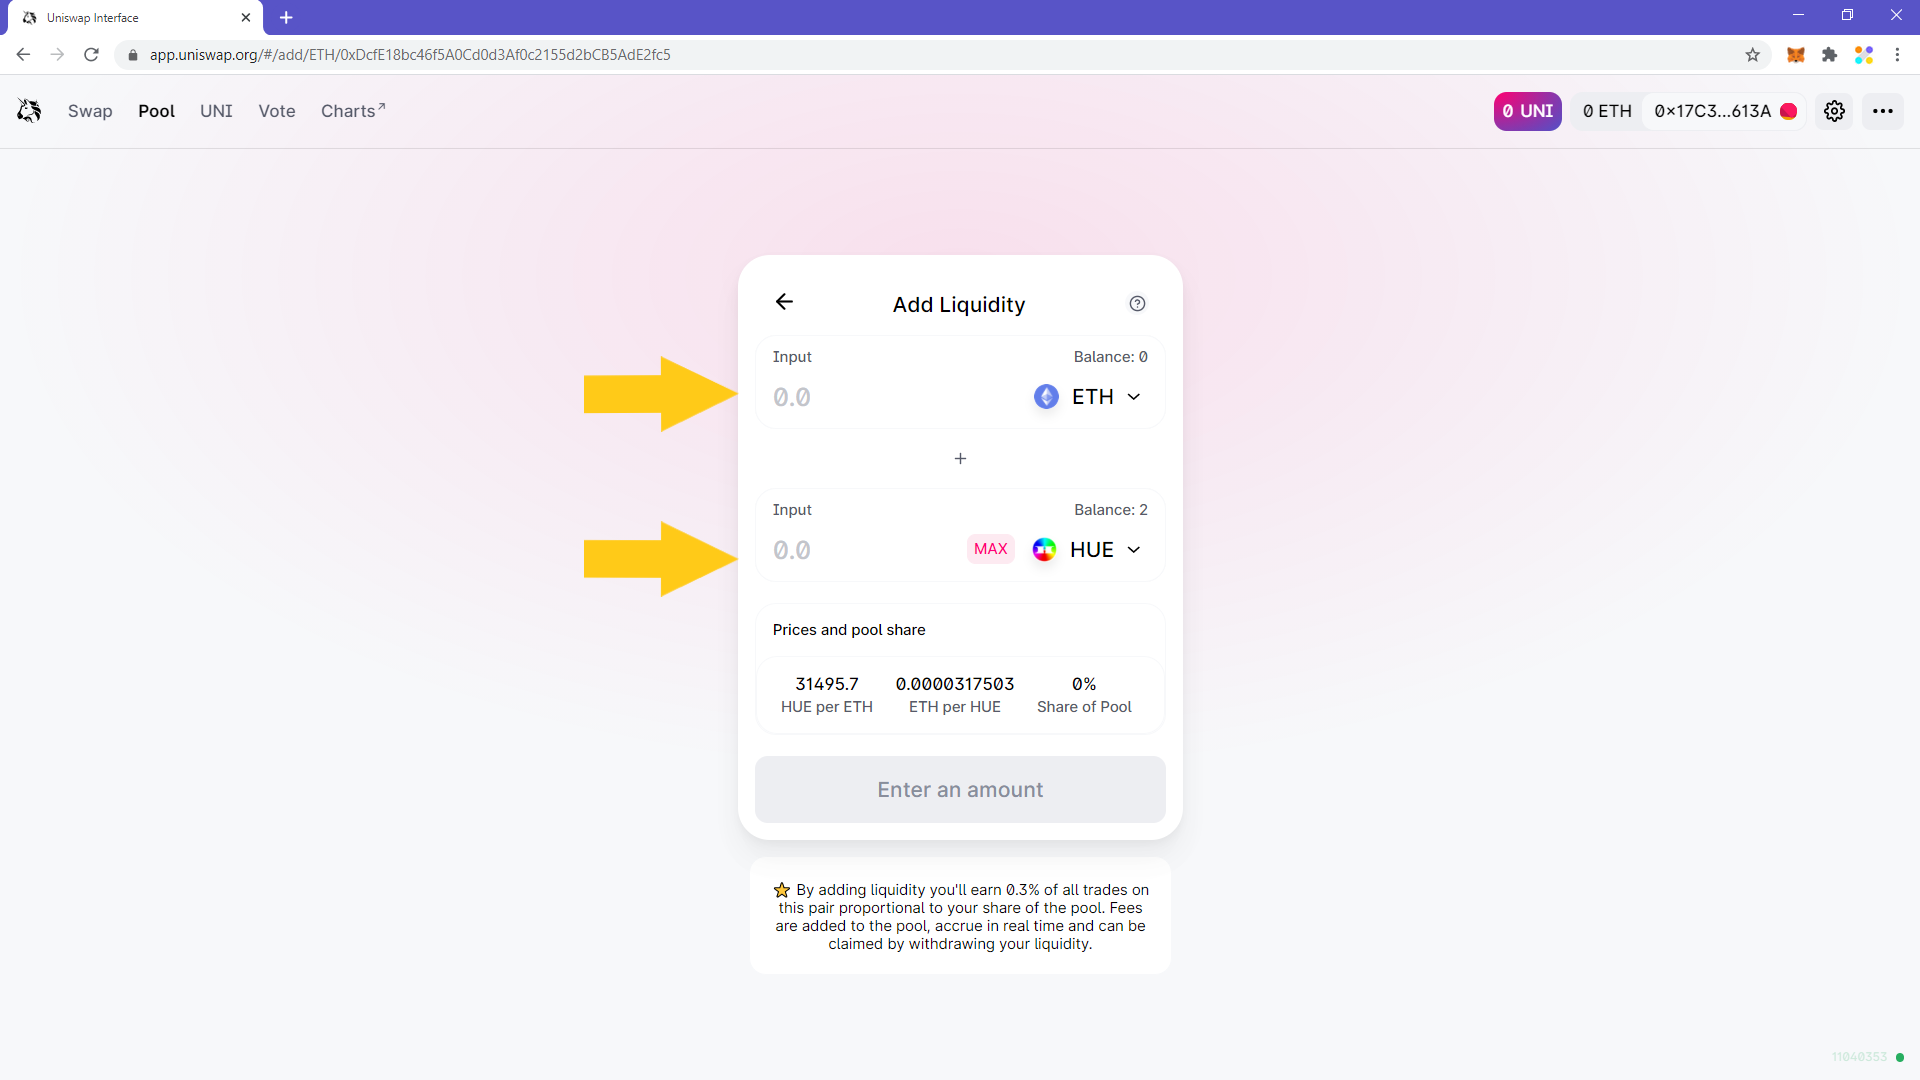
8. Click on “Select a token” to choose which ETH/token pair we’ll add liquidity to.

9. In order to quickly find social tokens, we’ve created and maintain a social tokens list on Uniswap. You can find the list by clicking on “Change” at the bottom right side of the panel that appears.
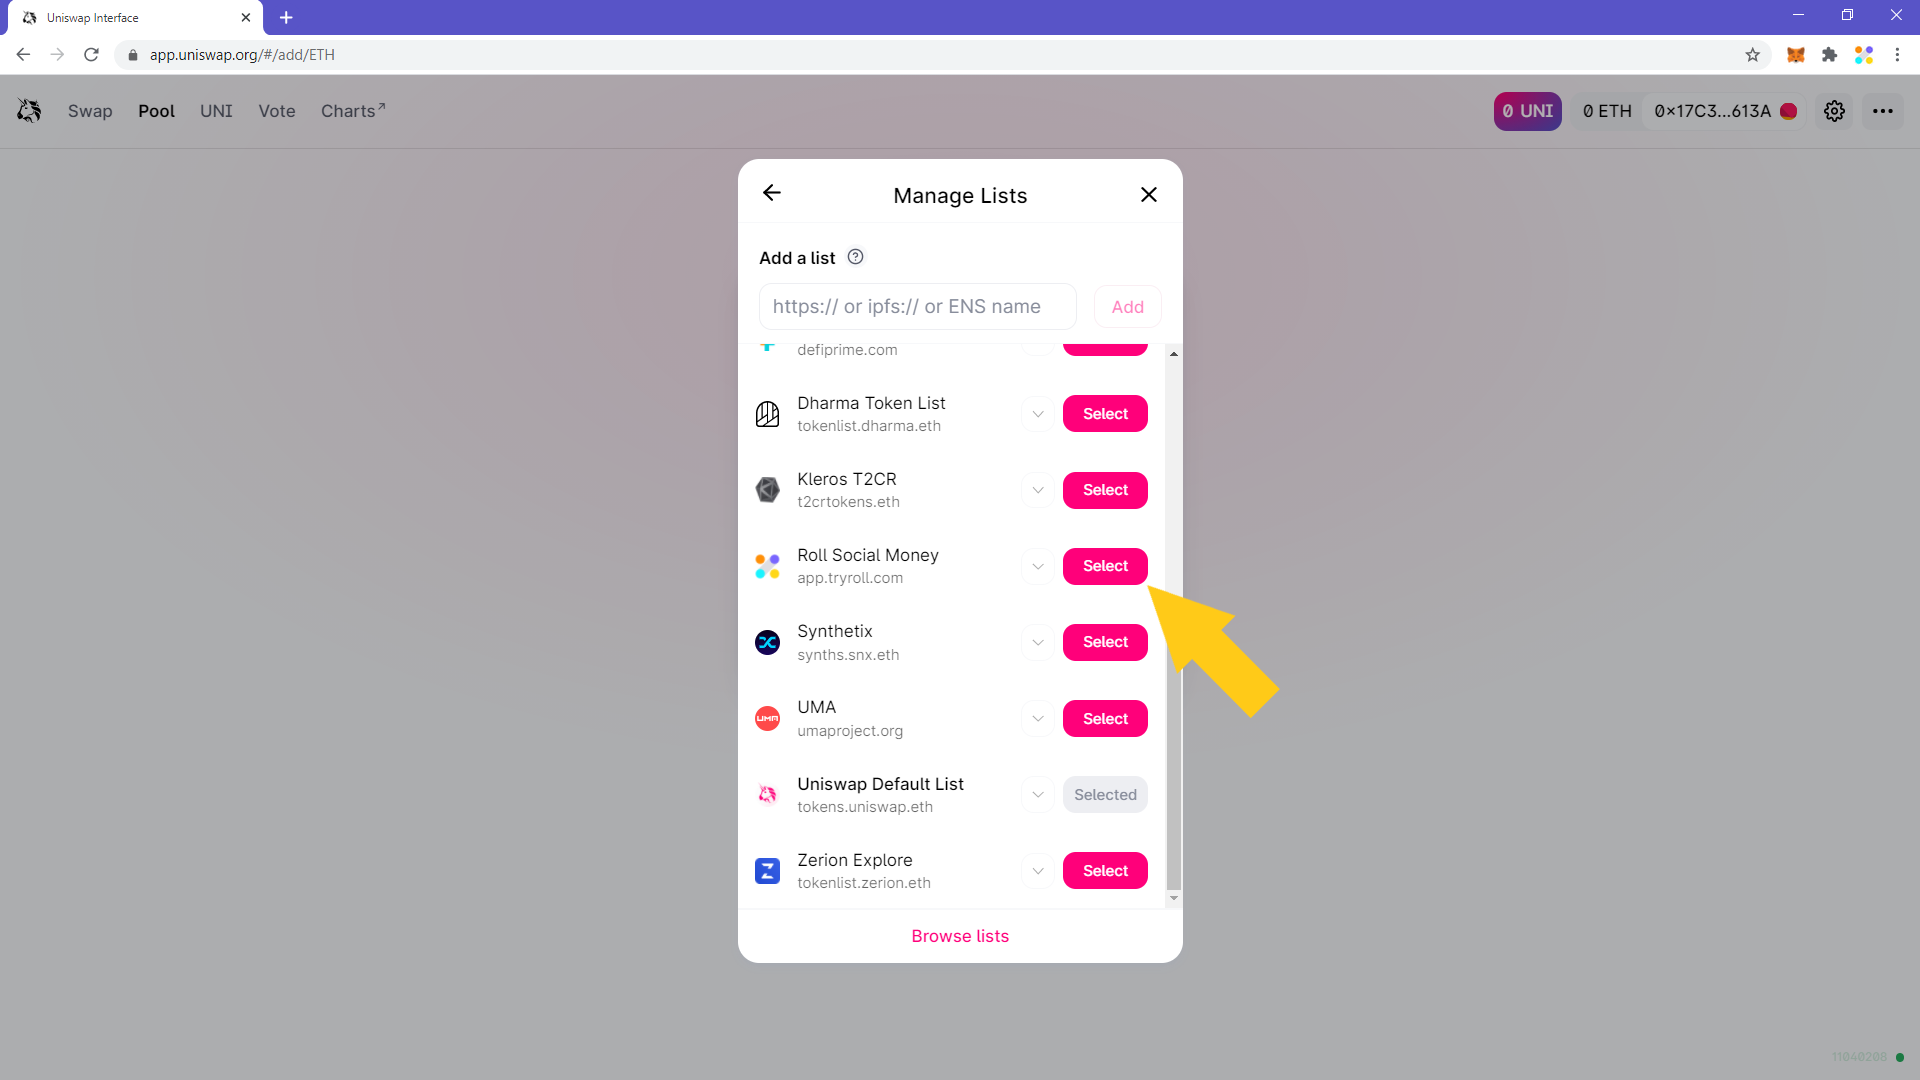
10. Select the “Roll Social Tokens” list so you can quickly and easily select the social token that you want to add liquidity to.
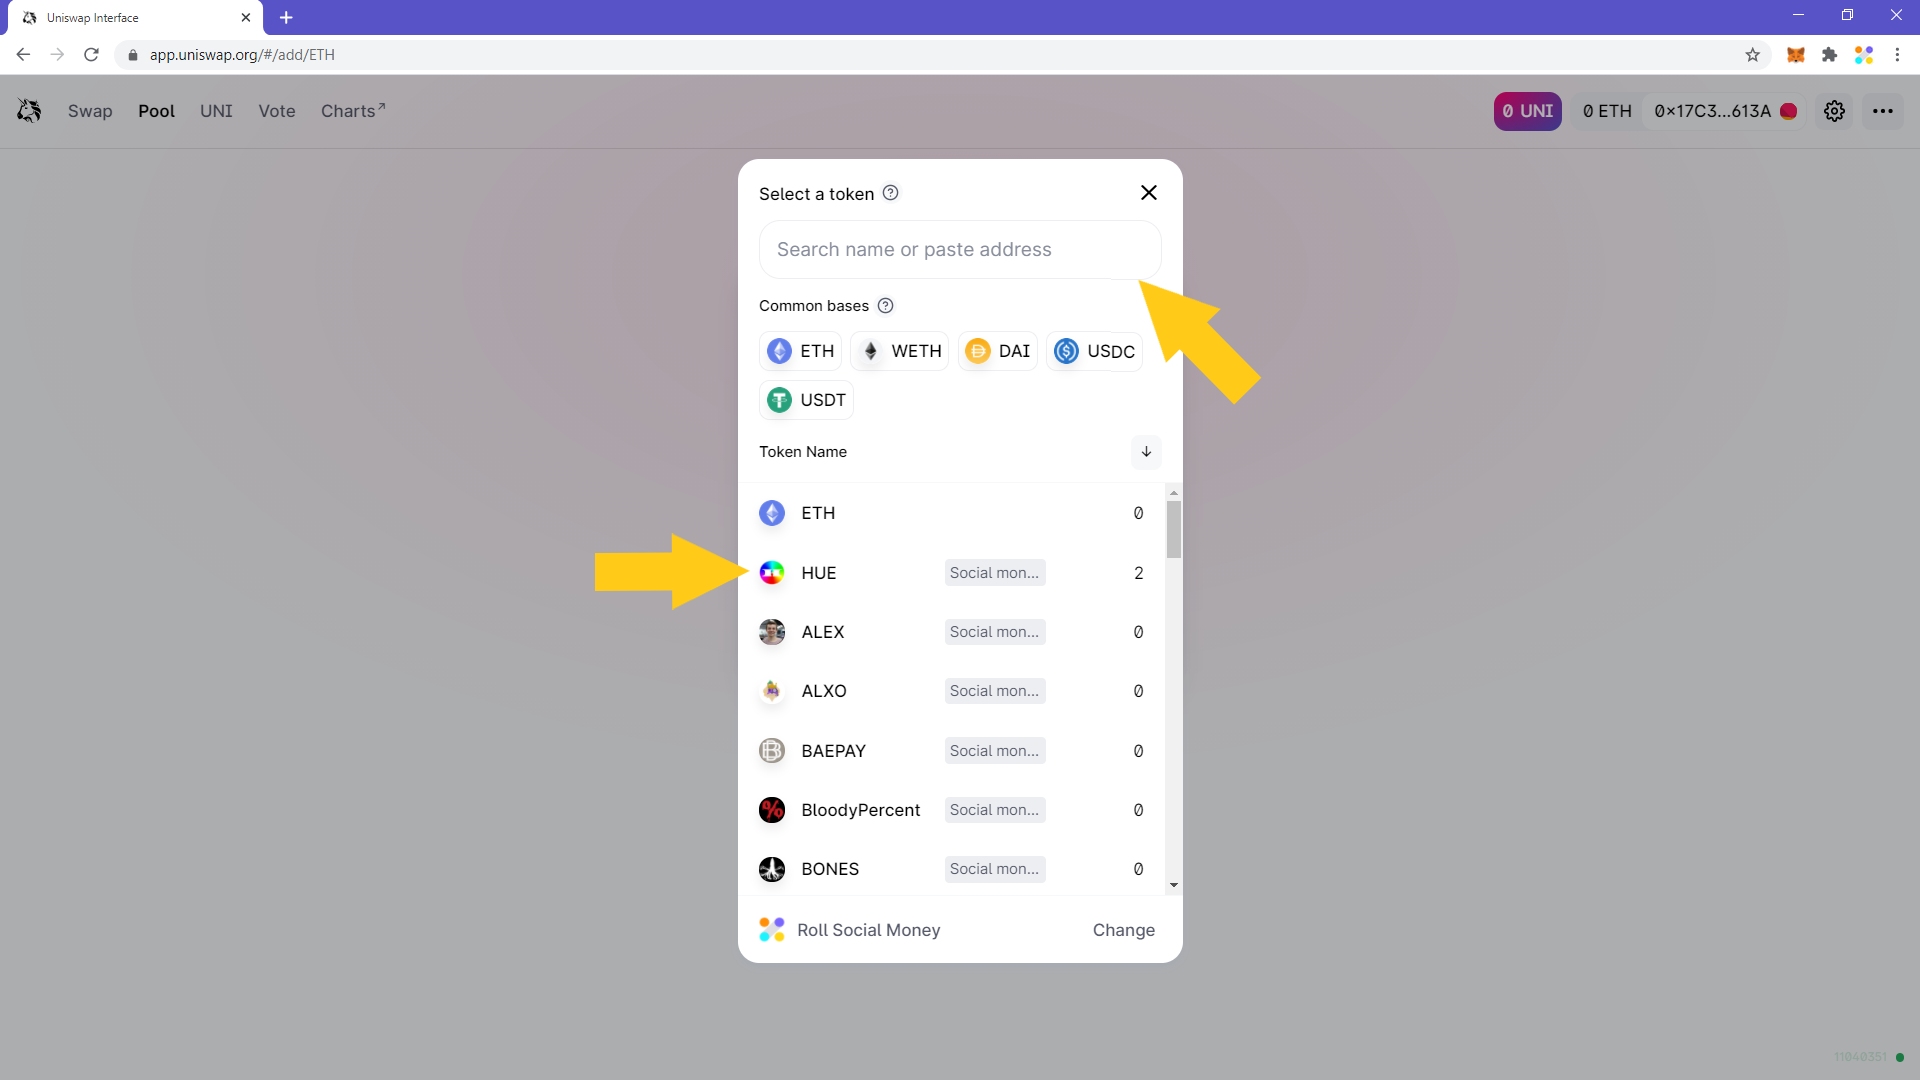
11. Select the token that you want to - we’re going to select HUE in this example. Alternatively, if you can’t find the token you want in the list, you can input its contract address at the top. See how you can find a token’s contract address here.
12. Fill in how much liquidity you want to add by inputting the amount of ETH or HUE in the respective fields. You only need to fill one of the two “Deposit” fields and it will automatically fill the other one with the appropriate amount. Once that is done, click on “Add Liquidity”.
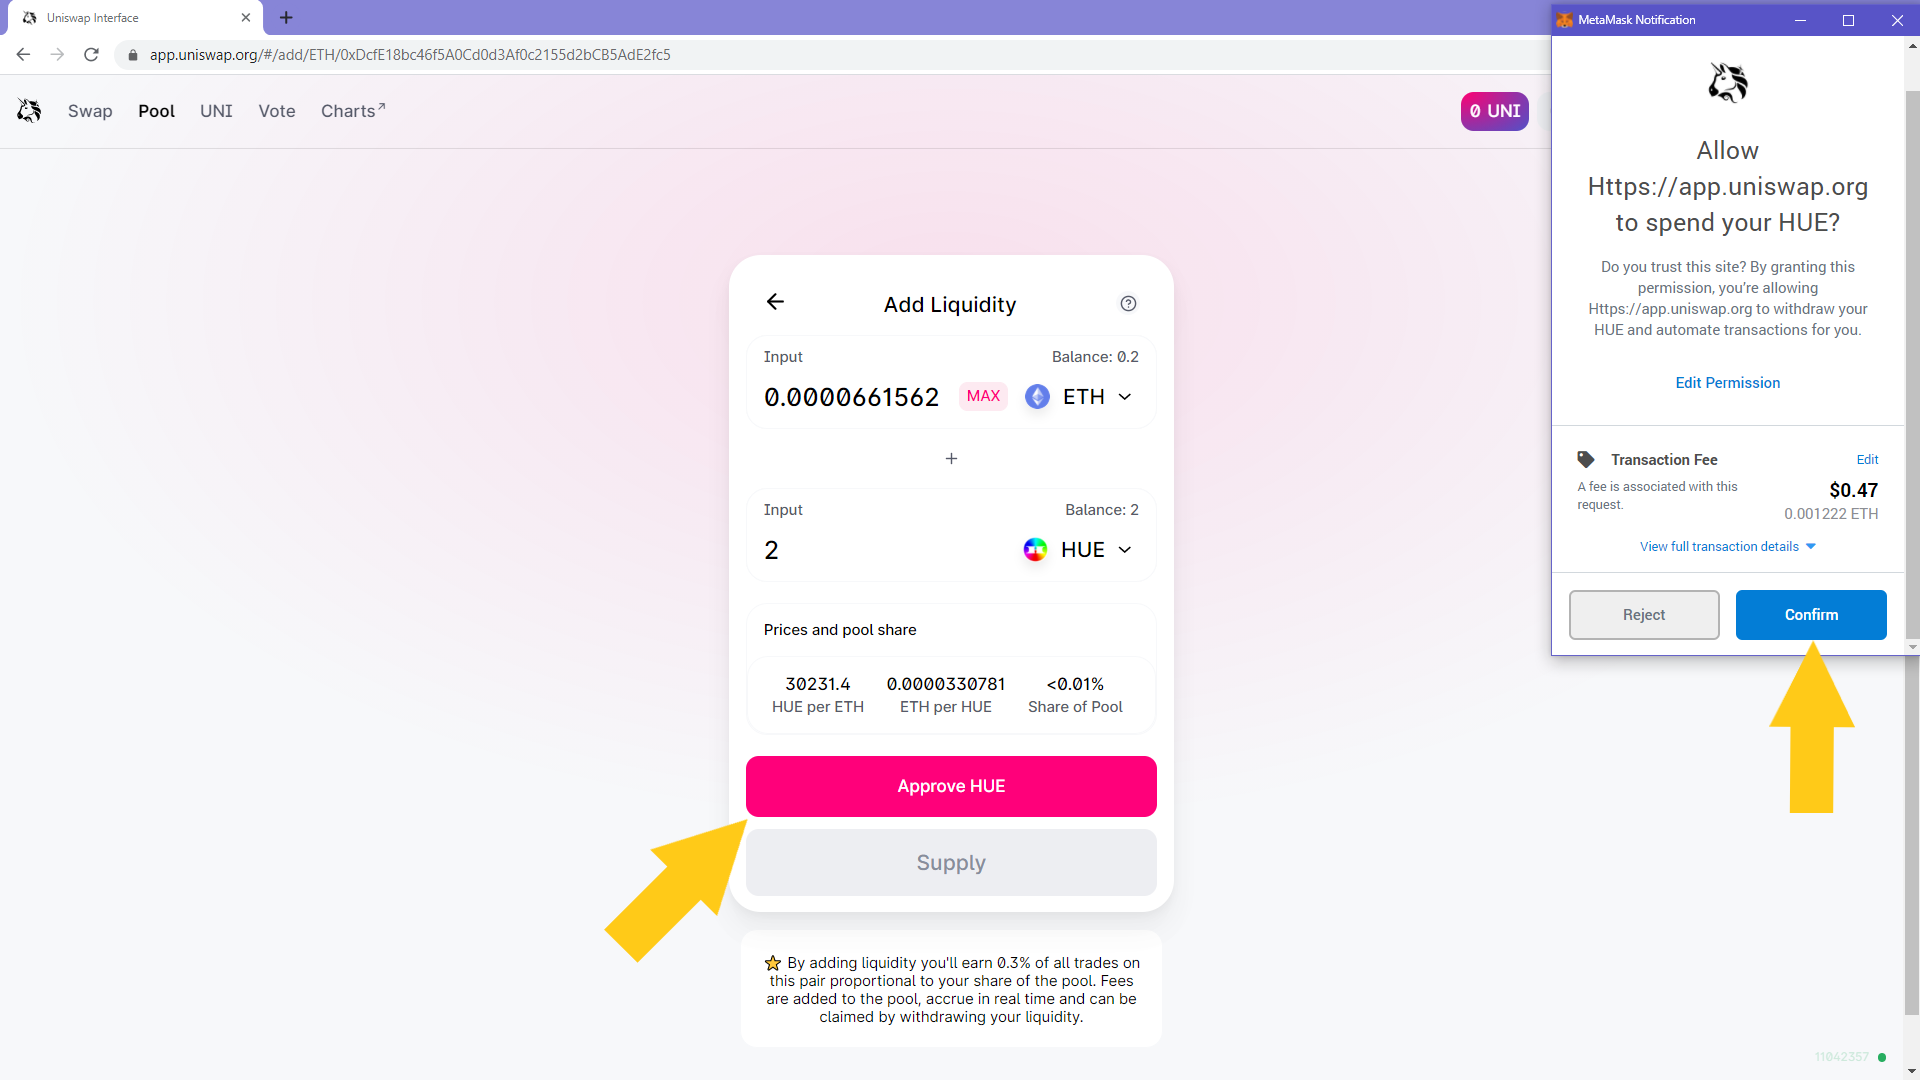
13. If this is the first time you’re interacting with the token you’re adding liquidity to, you’ll be asked to approve it. Click on “Approve” and then sign the transaction that will pop-up. Note that this transaction requires gas.
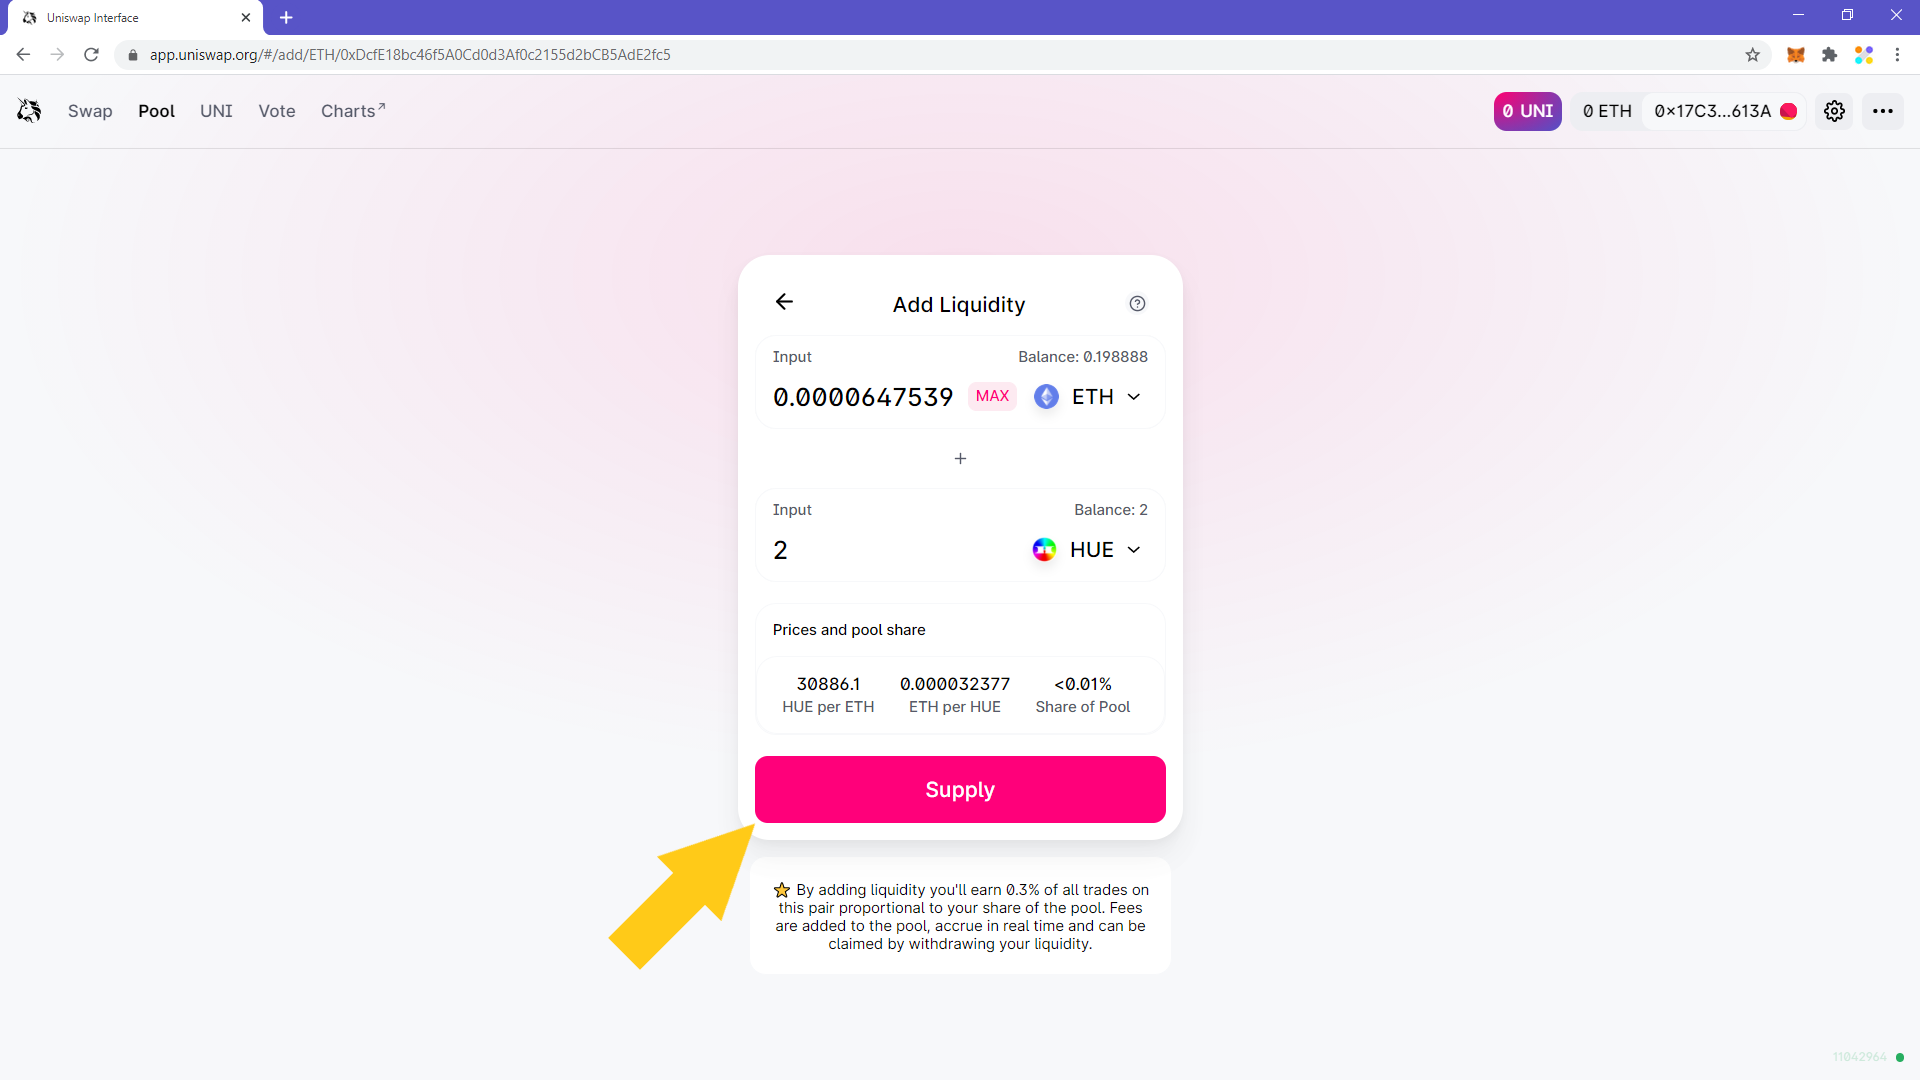
14. After that transaction goes through, click on “Supply”.
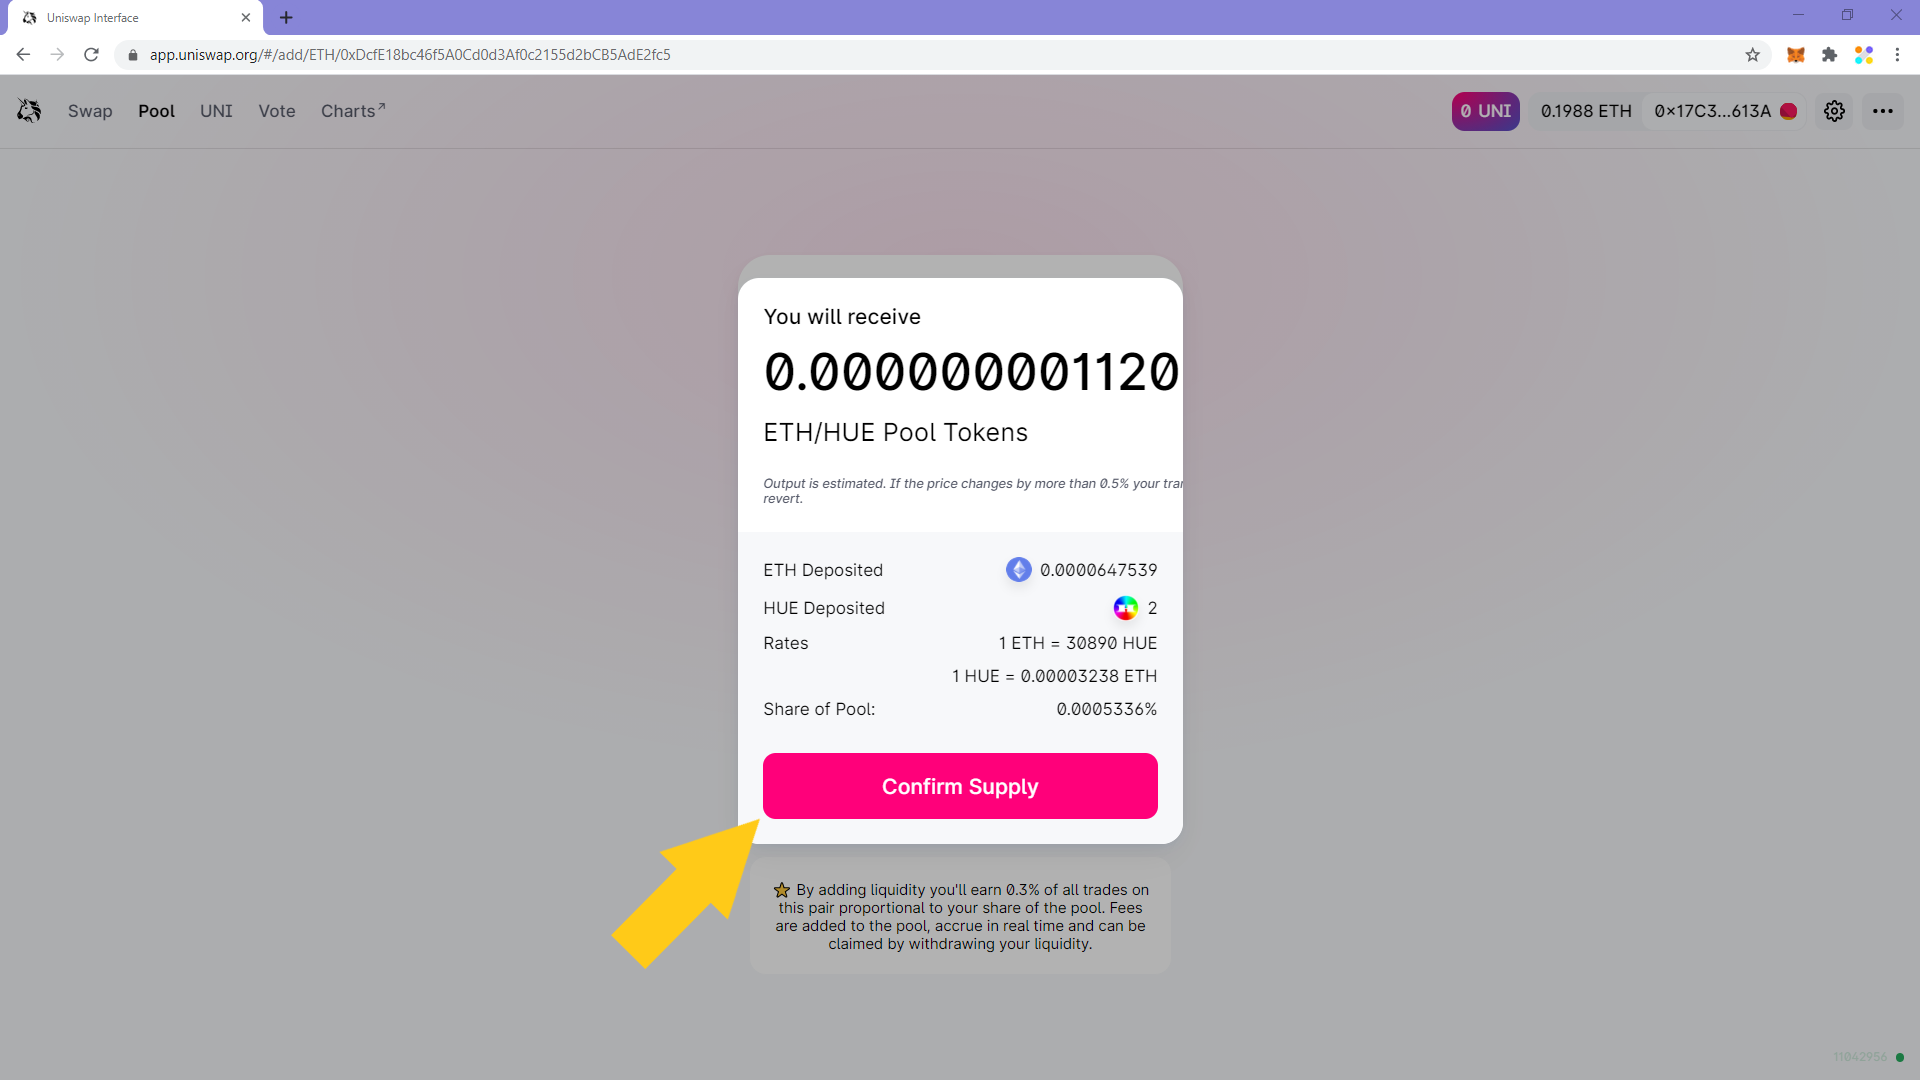
15. A panel will appear showing you the information of the liquidity you’re adding. Click on “Confirm Supply”.
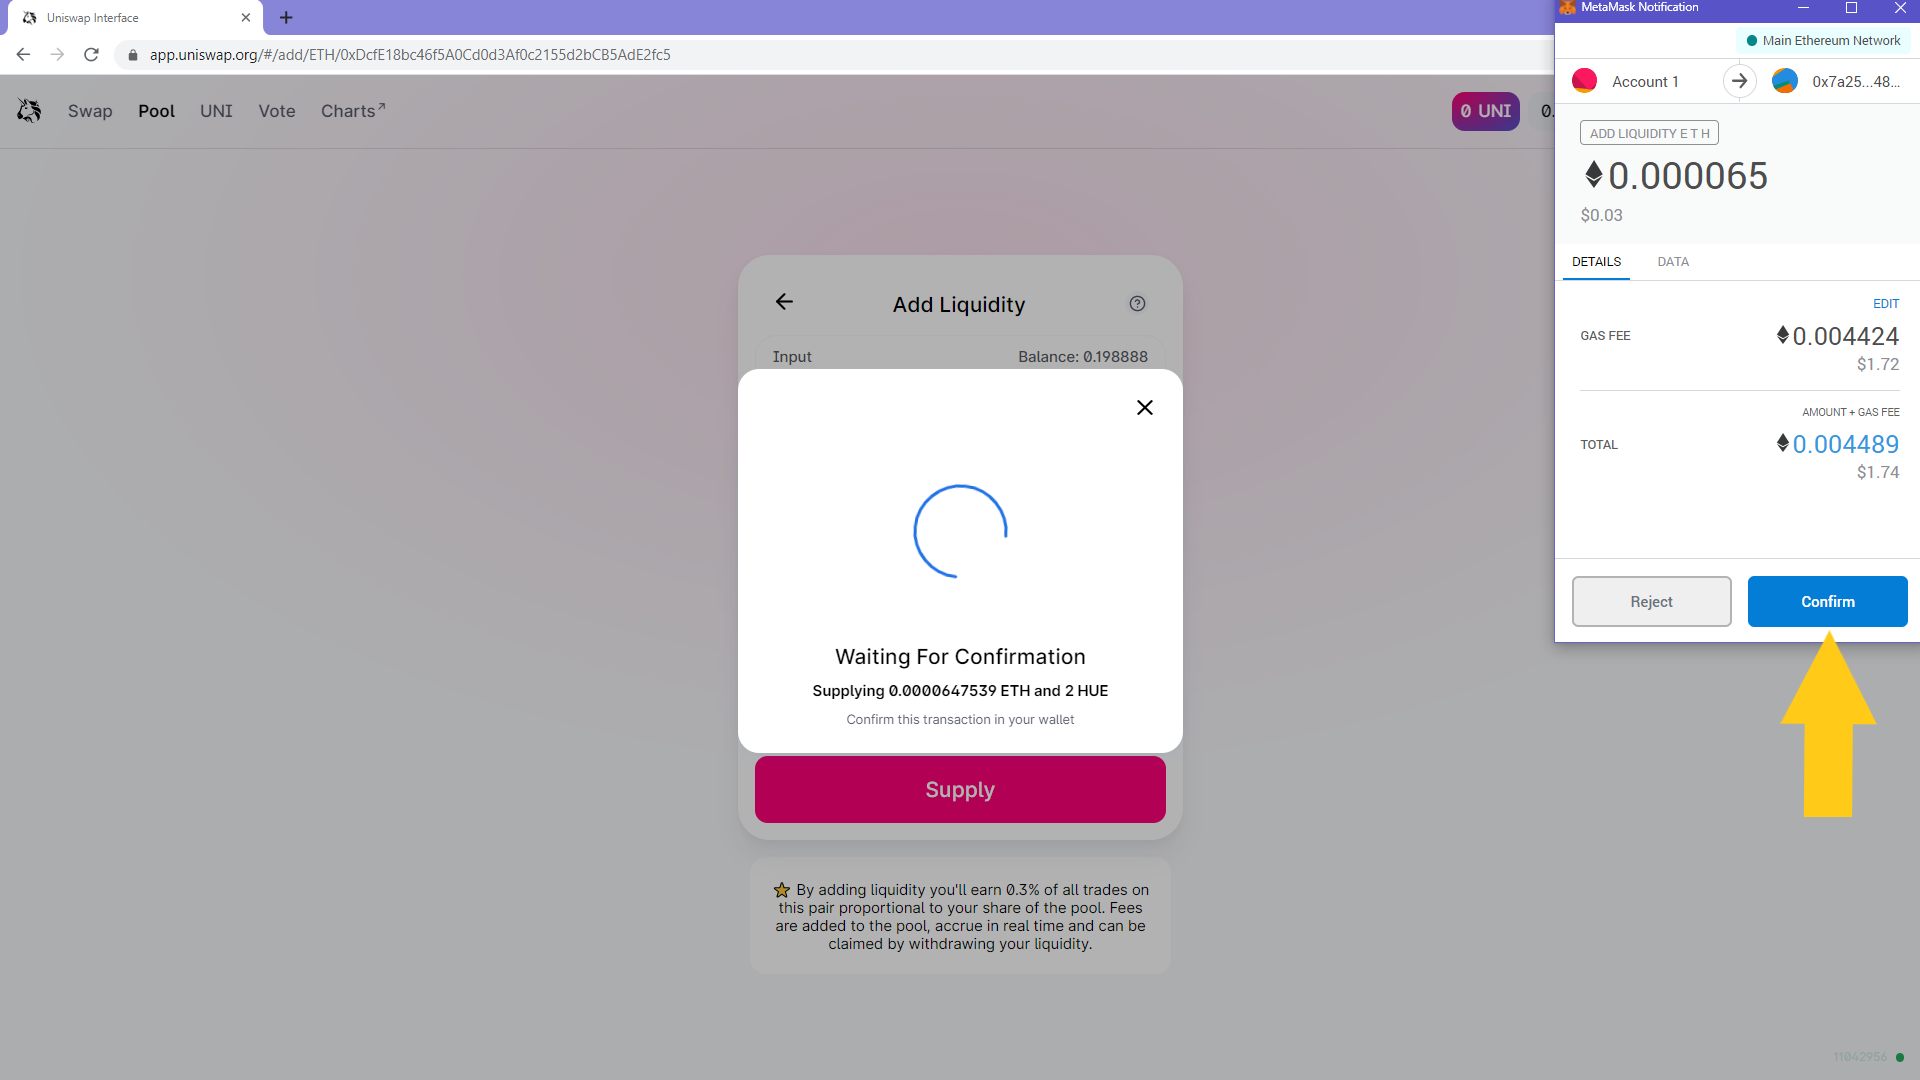
16. A popup will appear asking you to sign the transaction. Once you do, the transaction will initiate. It might take some time for the transaction to go through based on network traffic.
17. Once your transaction is confirmed on blockchain, you’ll be finally providing liquidity. If You can view the transaction on Etherscan, and click on “Close” to close that panel.

Comments
Article is closed for comments.